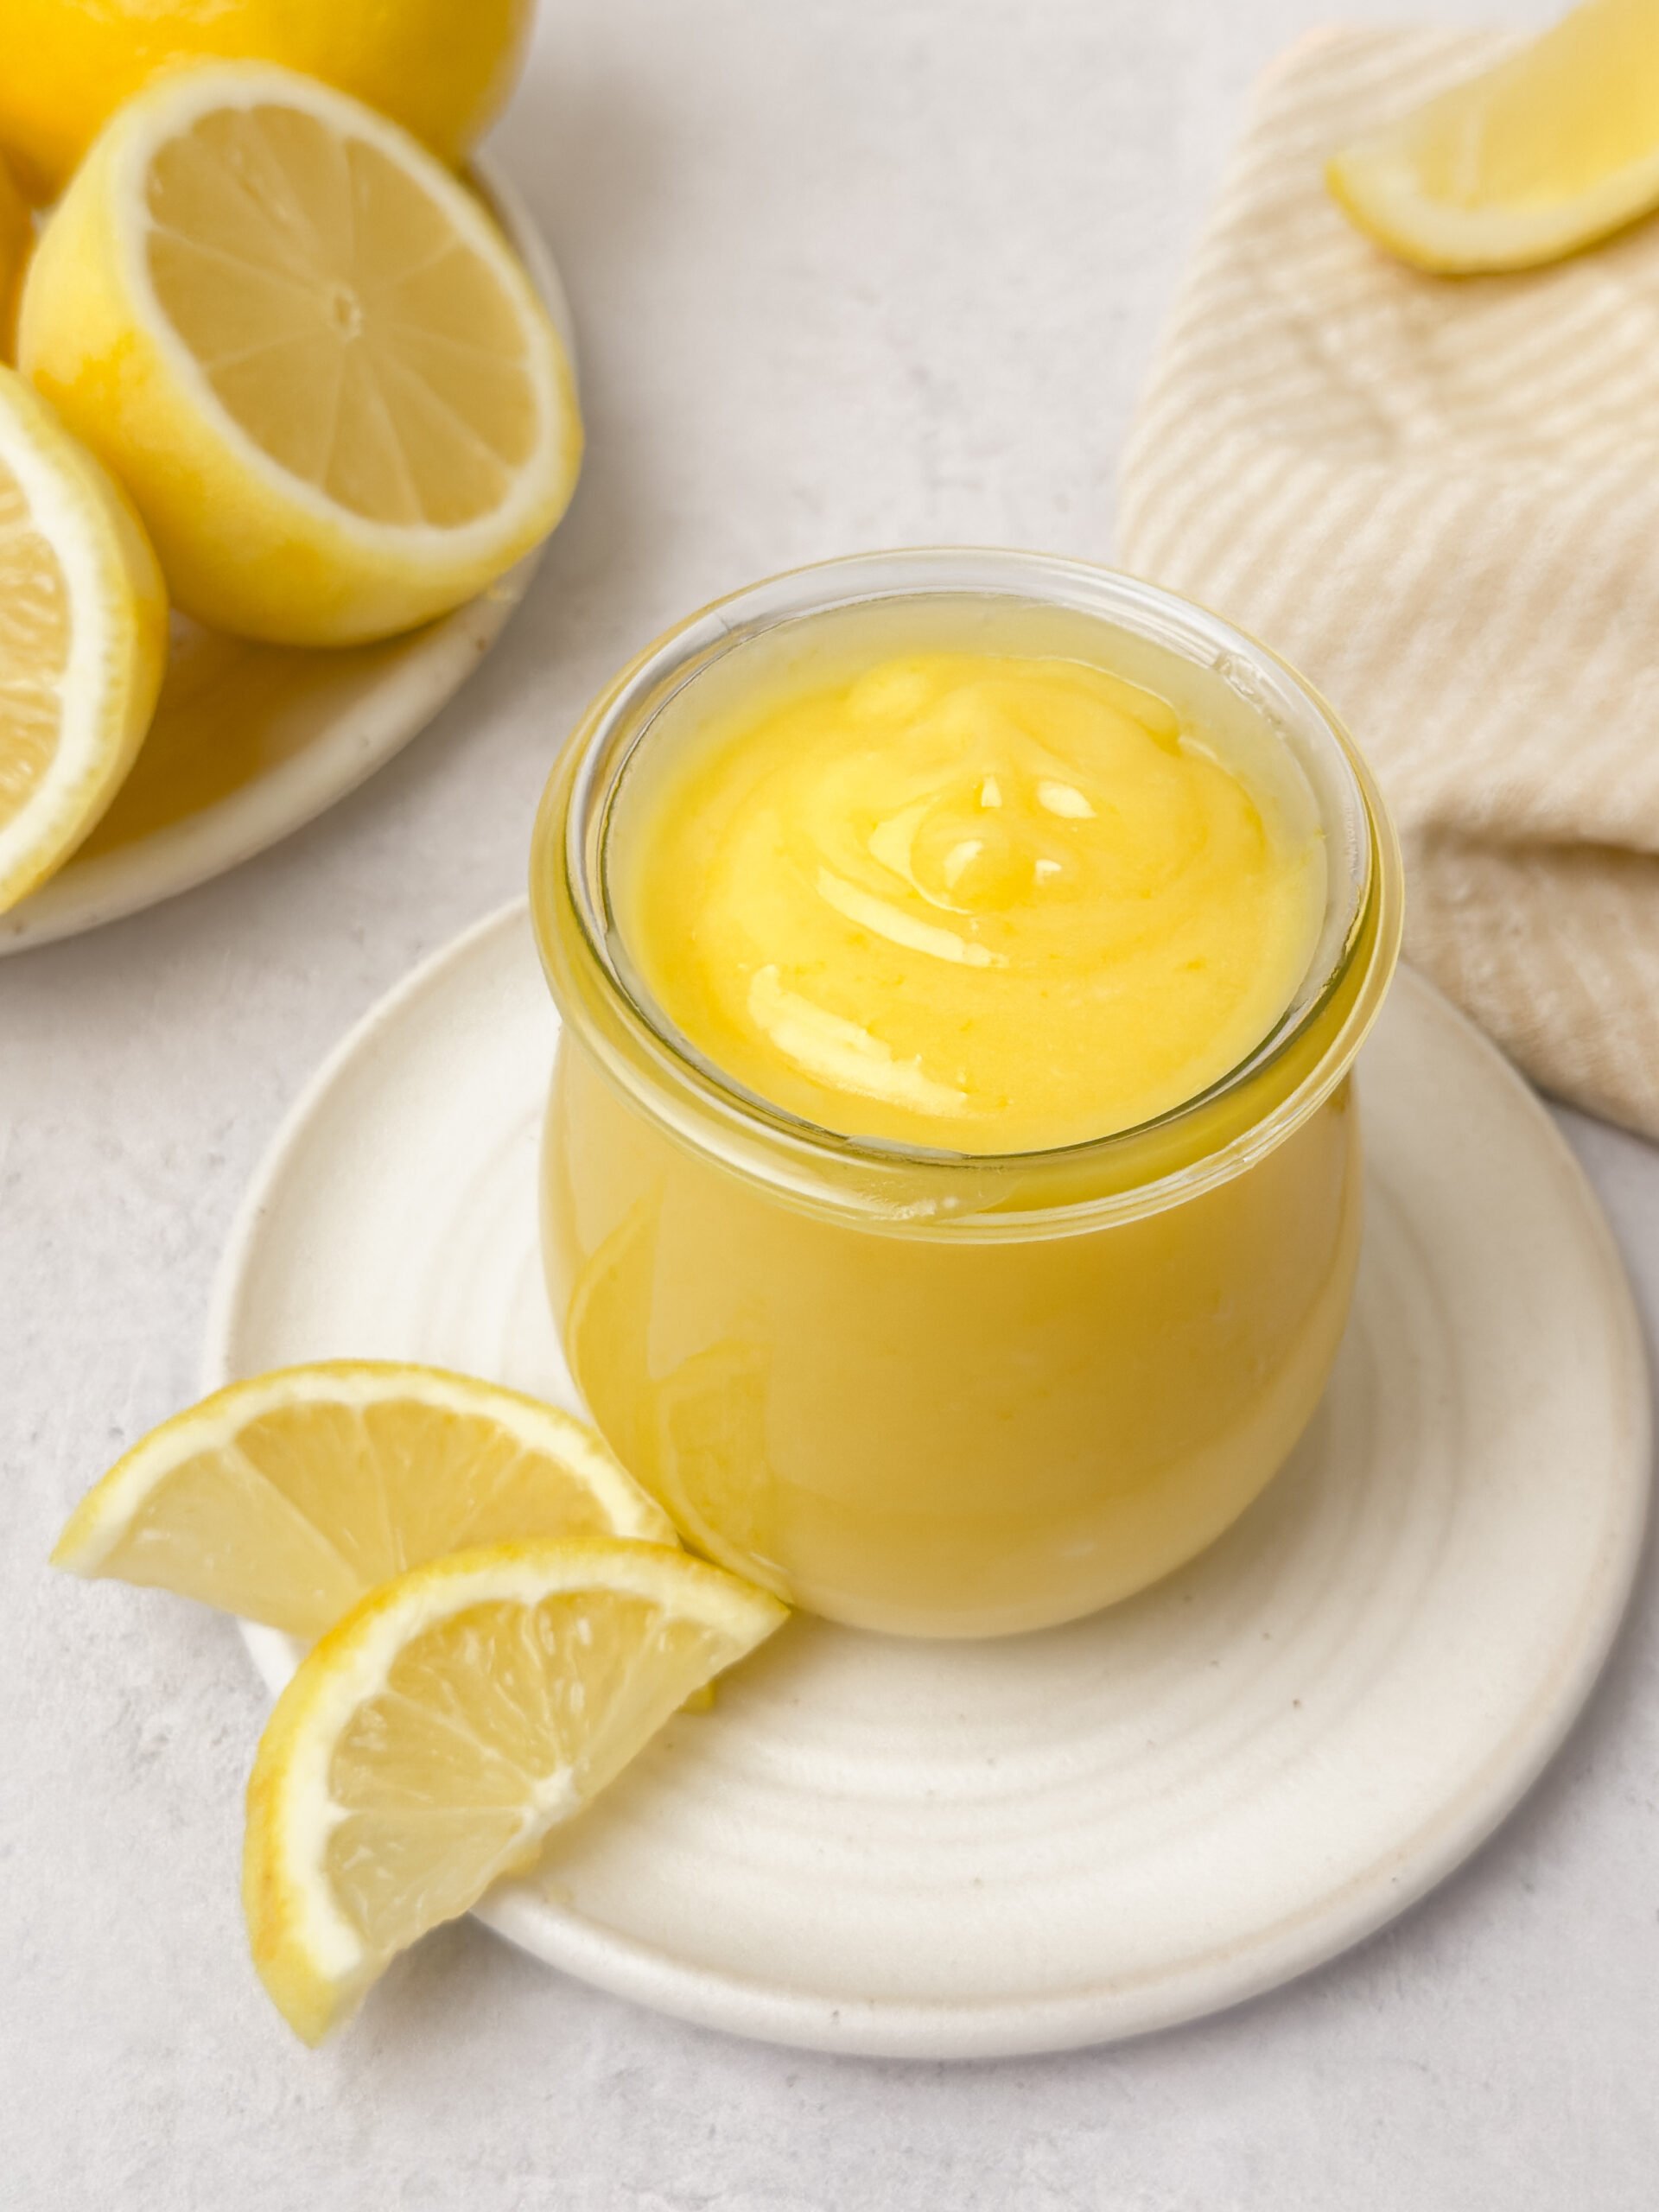
Lemon Curd
Learn how to make this easy, delicious, tangy lemon curd from scratch! Perfect for serving with crepes, filling cakes, or topping your favorite desserts.
This post may contain affiliate links. Please read my full disclosure policy.

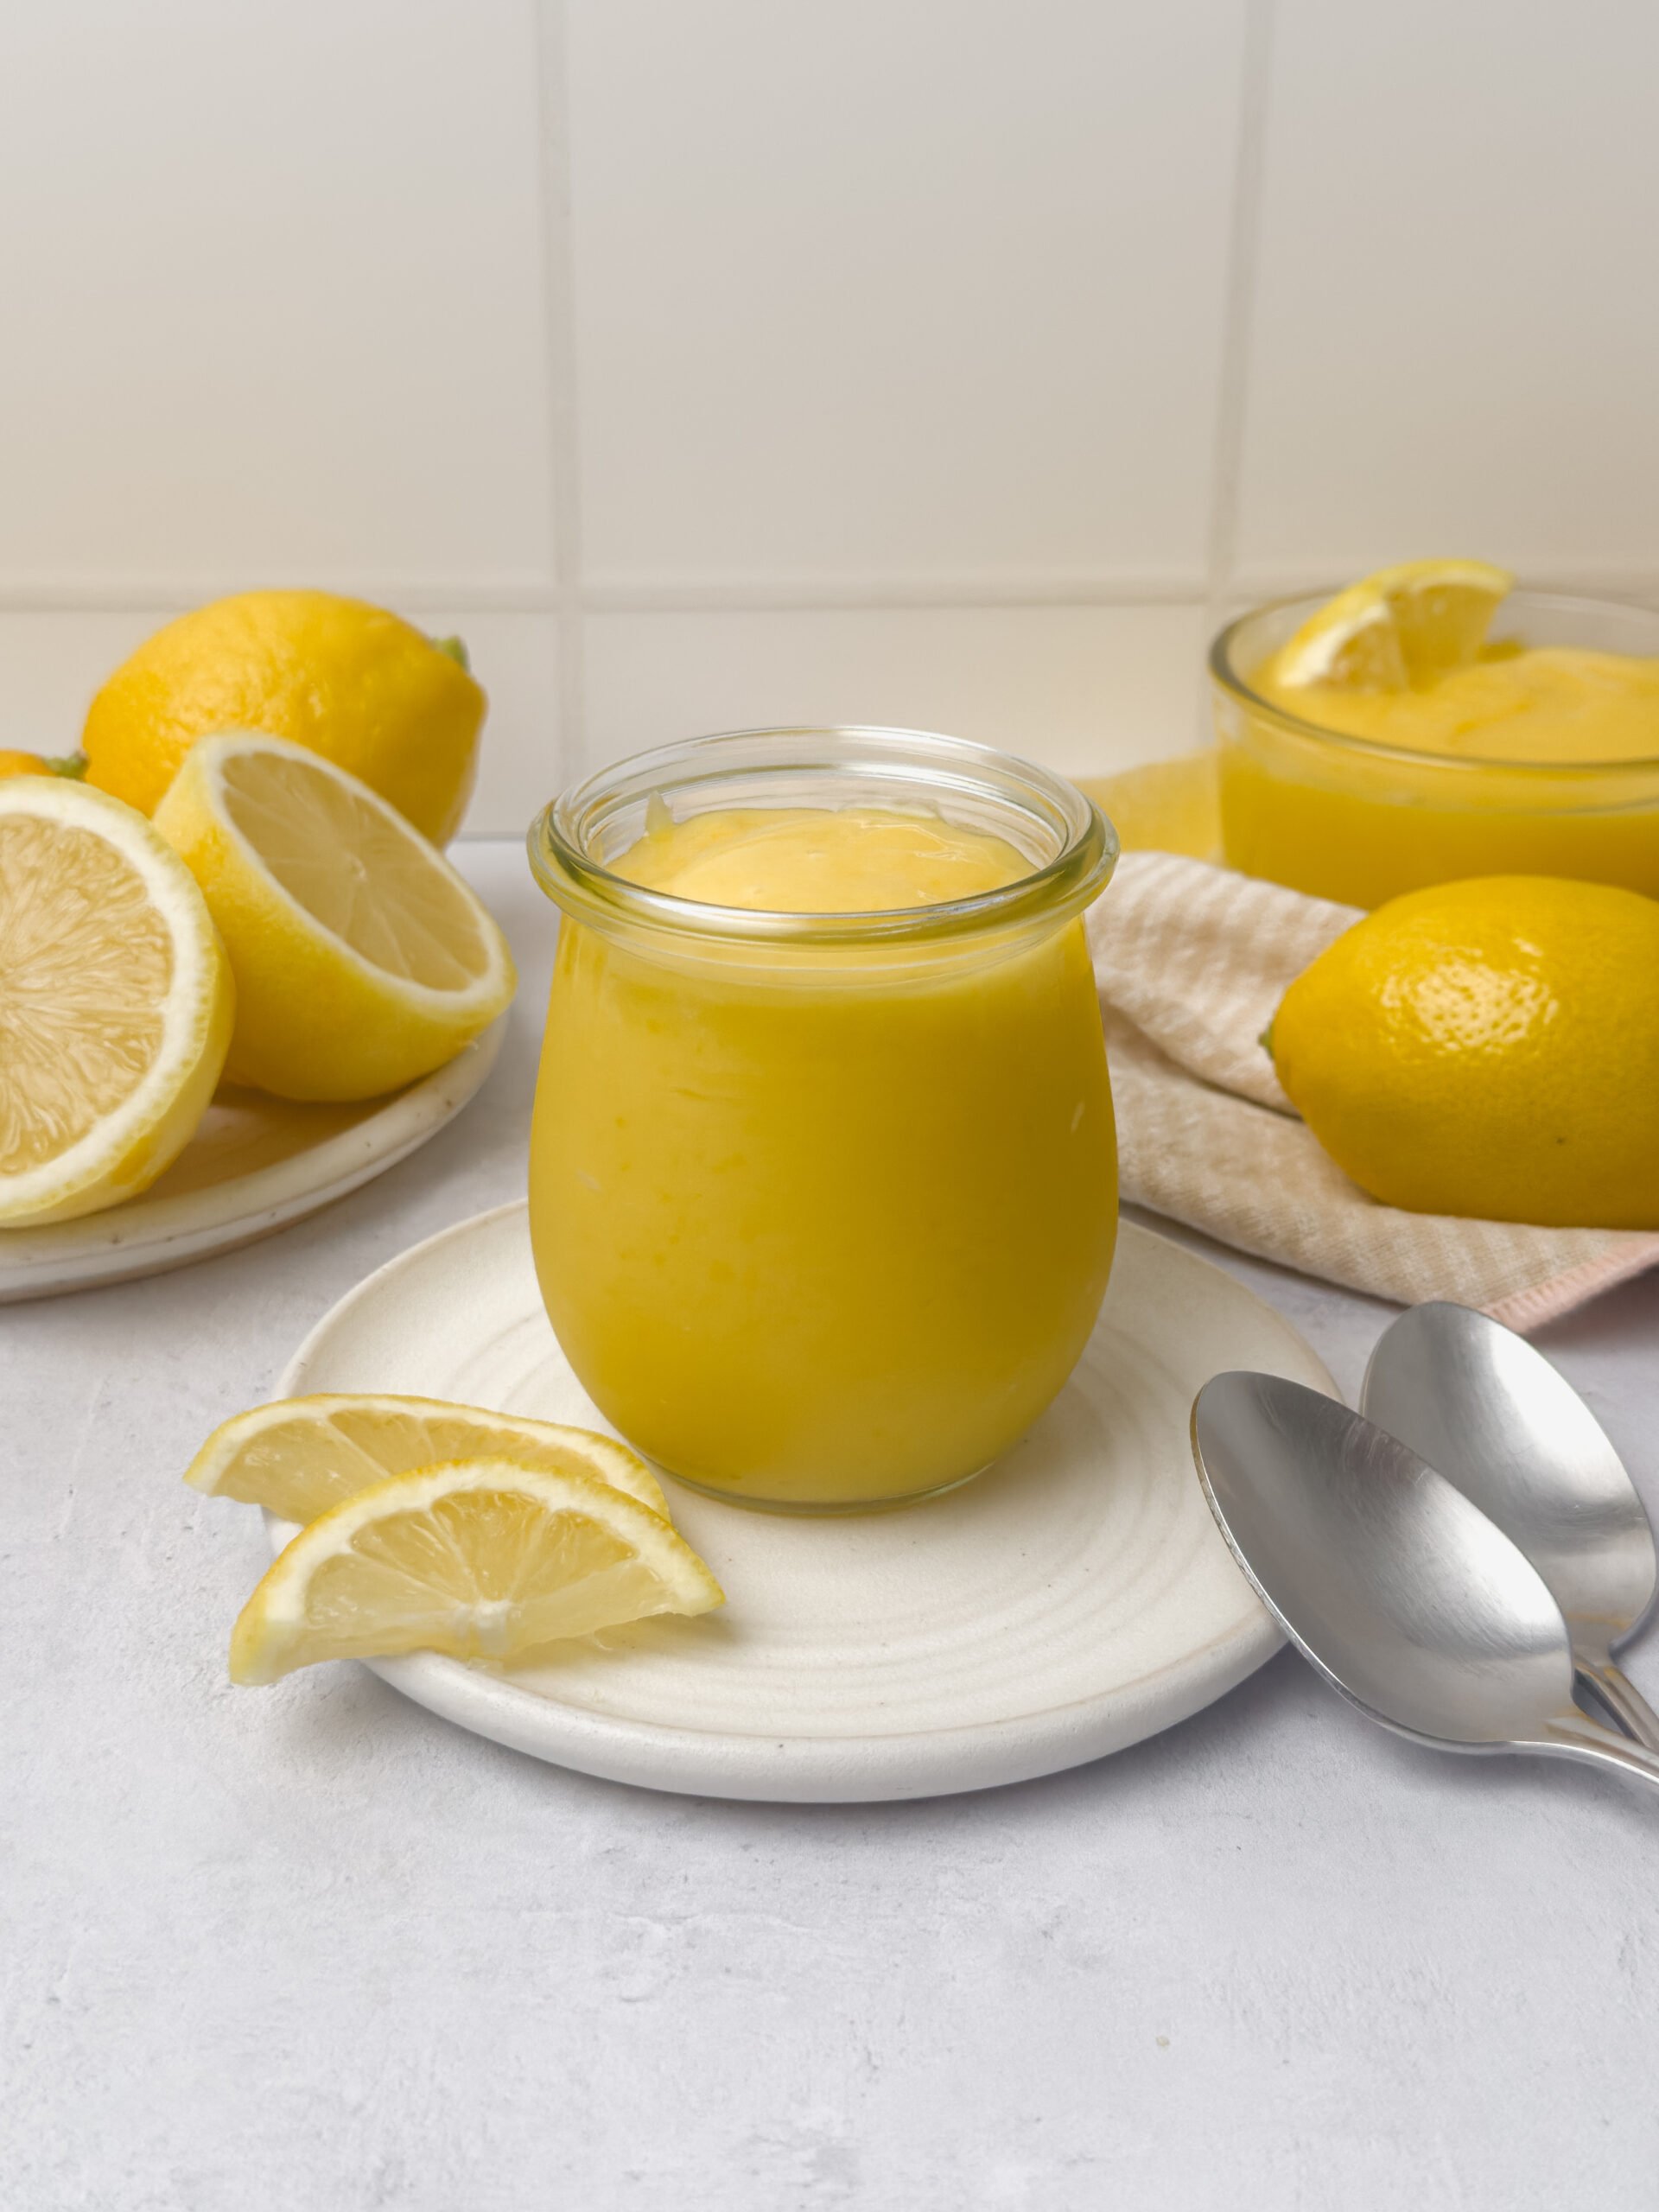
Fresh homemade lemon curd has the most incredible, natural lemon flavor. It’s creamy, thick, rich, and tangy. Whether you’re filling a cake, making a pie, or serving it with brunch, you’re going to fall in love at first taste!
What Is Lemon Curd?
Lemon curd is a thick and creamy spread or topping that is most often used in desserts or pastries. It’s made with fruit juice, most commonly citrus, lemon in this case. The main ingredients are sugar, egg yolks, lemon juice, and butter. Zest can be added for flavor, but is typically strained out at the end. The mixture is cooked over low heat until it thickens, then chilled in the fridge before being used. It’s smooth, silky, tangy, and perfect for lemon lovers.
Ingredients Notes
Lemons: the zest and juice of about 3 lemons. It should come out to about ½ cup lemon juice.
Sugar: granulated sugar gives the curd sweetness to offset the tart tanginess of the lemon.
Egg yolks: only yolks are needed – save your egg whites for the meringue on my Easy Lemon Meringue Pie Jars!
Salt: fine sea salt, just a little to balance out the sweet and tart.
Butter: this gives the curd its silky texture and helps it thicken as well.
Ways to Use Lemon Curd
- Lemon Curd Cookies
- Lemon Curd Cake
- On top of pancakes and waffles
- Cake filling
- Cheesecake topping
- Over vanilla ice cream
- Enjoy with pastries, scones, and crepes
- Serve over yogurt and top with granola

How to Make Lemon Curd
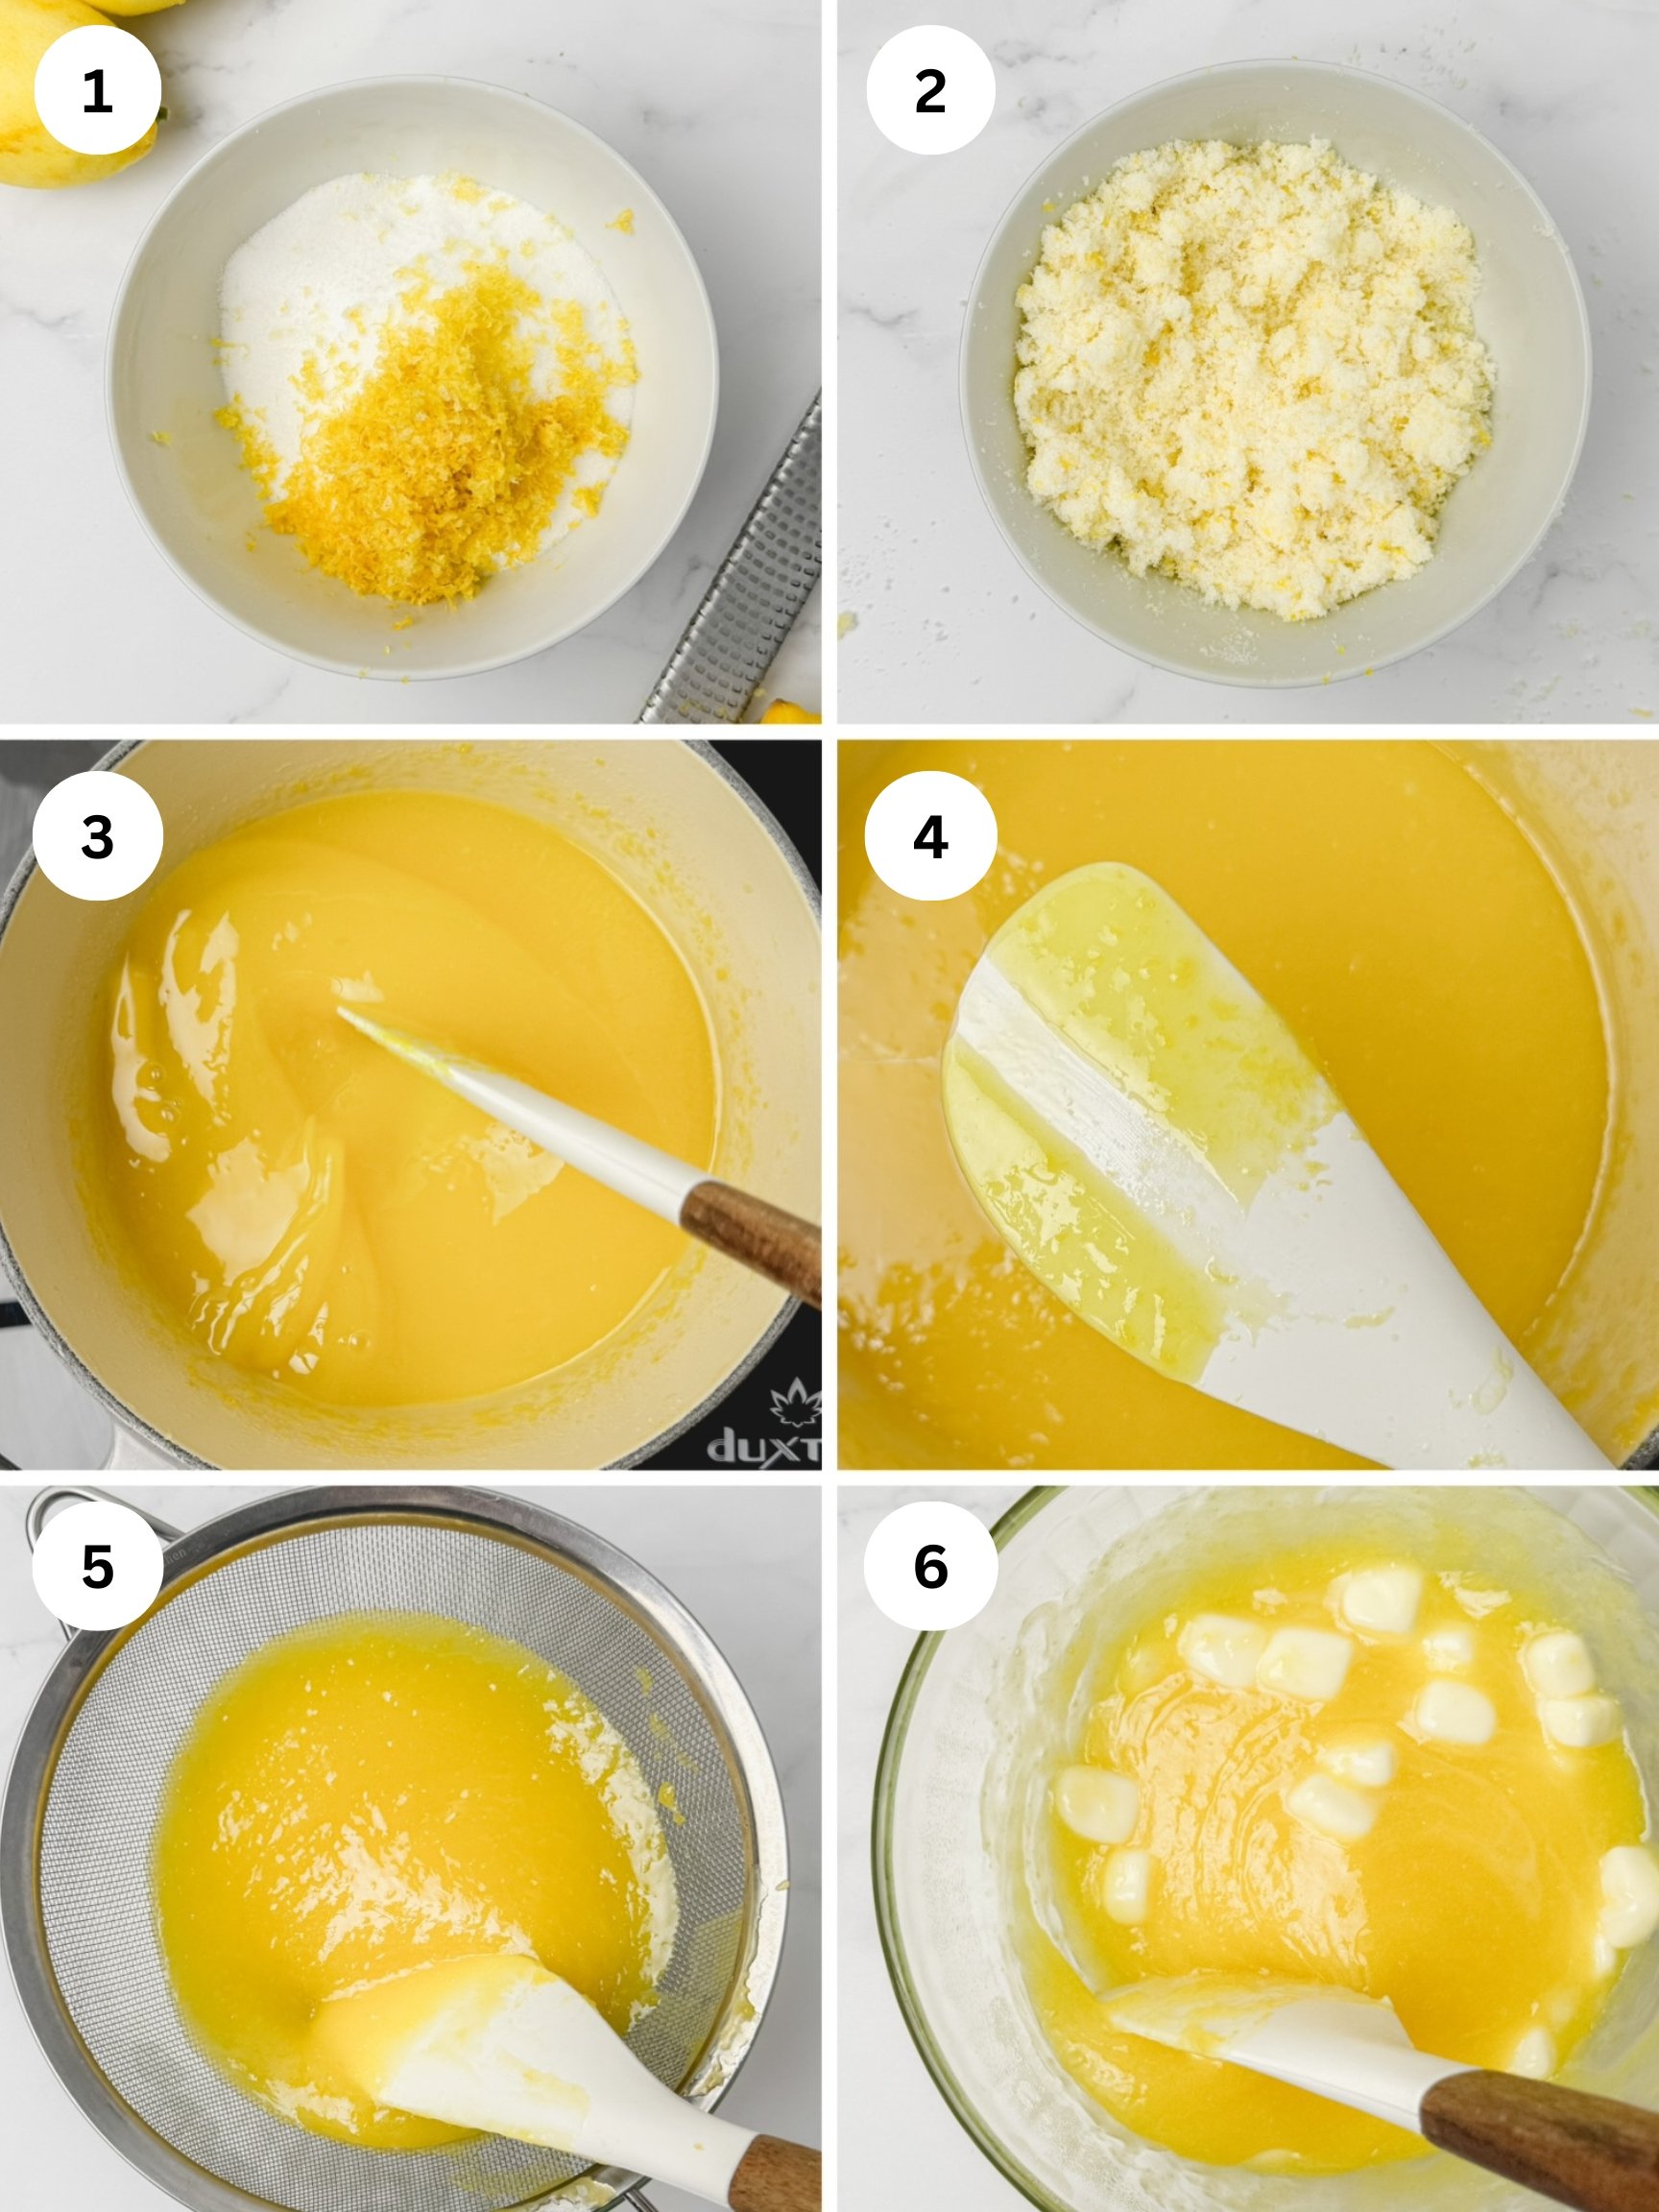
- In a medium pot, combine sugar and lemon zest.
- Add egg yolks and salt and whisk until the mixture lightens in color.
- Whisk in the lemon juice slowly and mix until thoroughly combined.
- Cook on the stove over low heat until the mixture thickens and reaches 170°F.
- Use a fine mesh sieve to strain the mixture into a bowl to filter out the zest and any lumps of egg that may have cooked.
- Mix in cubes of butter until melted and combined.
- Place a piece of plastic wrap directly on top of the curd to prevent a skin from forming.
- Refrigerate the lemon curd until chilled, at least 2 hours.
- Serve over yogurt, fill cakes and pastries, or enjoy by the spoonful!


Lemon Curd Recipe FAQ
Do I need to use a double boiler?
No, this recipe does not require a double boiler (a bowl on top of a pot of boiling water). As long as you keep the heat on low and constantly stir to prevent curdling, you can place your saucepan directly over the heat.
How can I tell if the lemon curd is done?
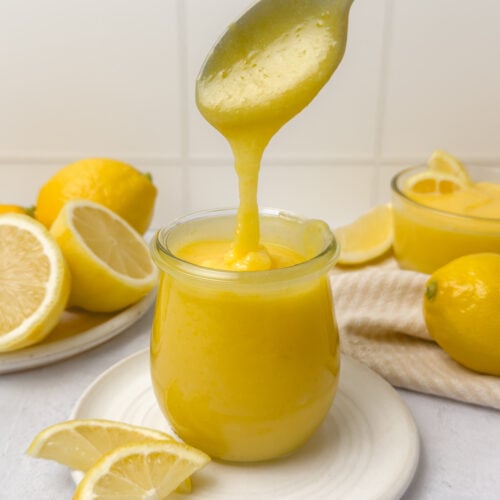
The curd will thicken while cooking, and the simplest way to tell if it’s done is by using an instant-read digital thermometer. It should reach at least 170°F, but you can go up to 180°F for a thicker consistency. The curd should also coat the back of a spoon and hold its shape when you draw a line in it with your finger.
How long does homemade lemon curd last in the fridge?
Store the lemon curd in a glass jar or an airtight container in the refrigerator for up to 2 weeks.
Can you freeze lemon curd?
Yes! Store the cooled lemon curd in an airtight container in the freezer for up to 2 months. Thaw in the fridge overnight.

Tips for Making the Best Lemon Curd
Chill. Allowing the curd to chill in the fridge is imperative for it to set up thick. As the curd cools and the butter solidifies, you end up with a nice, thick, creamy curd. Give it at least 2 hours in the fridge or until completely chilled.
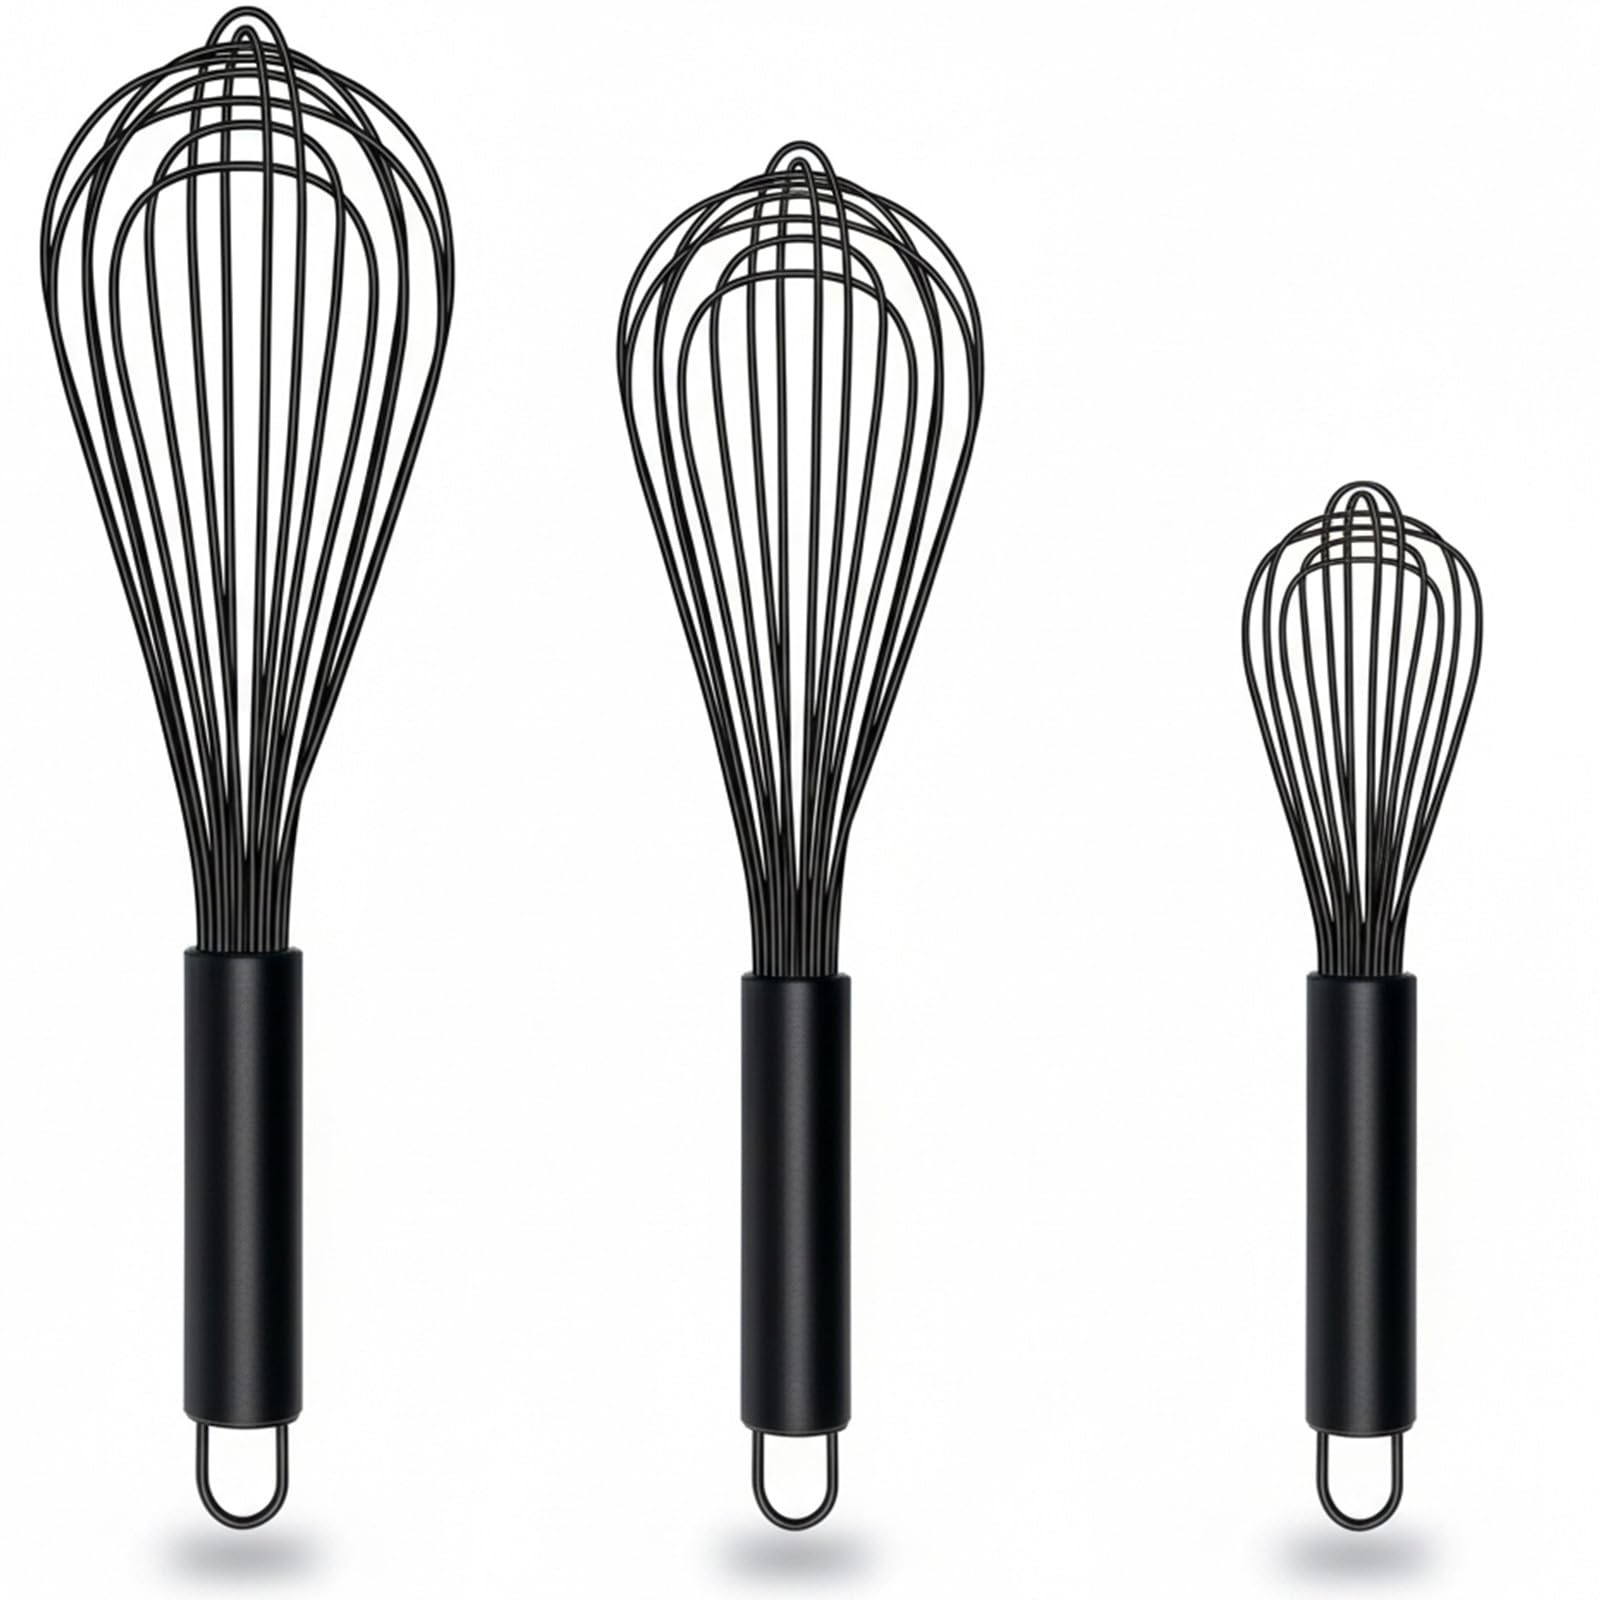
Avoid using a metal pan. Metal pans, like aluminum or copper, do not mix well with acidic juices. The metal pan can react with the acidity from the lemon juice and can lead to a metallic aftertaste. I also recommend using a silicone-coated whisk.
Low heat. To prevent the eggs from curdling, the mixture needs to be cooked over low heat. It requires a little patience to allow the curd to thicken, but it’s worth it so you don’t end up with scrambled eggs.
Strain. Just in case any bits of egg get cooked, straining the lemon curd through a fine mesh sieve will help catch those. Doing this will also strain out the lemon zest, for a silky smooth curd.
Baking Tip: Weigh Your Ingredients!
I highly recommend using a kitchen scale to weigh your ingredients rather than using measuring cups because it is the most accurate way to bake. Weighing your ingredients will give you more consistent results with your recipes and a better success rate, every time. Using a scale also saves you dishes which means easier cleanup! I provide gram measurements in all my recipes and this is the scale I love to use.
Fruit Curds and Compotes You’ll Love
If you make this recipe and love it, be sure to leave a comment below. Happy baking!
Lemon Curd
Ingredients
- 1 cup (200g) granulated sugar
- zest of 3 lemons
- 6 large egg yolks
- ¼ teaspoon salt
- ½ cup (120mL) fresh lemon juice, from about 3 large lemons
- ½ cup (1 stick or 113g) unsalted butter, cut into small cubes
Instructions
- Combine the sugar and lemon zest in a medium saucepan, rubbing the mixture between your fingers to help release the oils. Add the egg yolks and salt and whisk together until the mixture lightens in color.
- Slowly stream in the lemon juice while whisking and mix until combined.
- Place the mixture over low heat, stirring constantly with a heatproof spatula, until it thickens and reaches at least 170°F on an instant-read thermometer (up to 180°F for a thicker curd), about 7-10 minutes. The curd should coat the back of a spoon, and when you run your finger through it, the line should hold its shape without the curd running.
- Remove the pan from the heat and strain with a fine mesh sieve to filter out the lemon zest. Stir in the cubes of butter until melted and fully combined. Place plastic wrap directly on the surface of the curd and refrigerate for at least 2 hours or until completely chilled. The curd will continue to thicken as it cools.
- Serve over ice cream, fill cakes and pastries, or enjoy by the spoonful. Store in a jar or an airtight container in the fridge for up to 2 weeks.