Nutella Brioche Buns
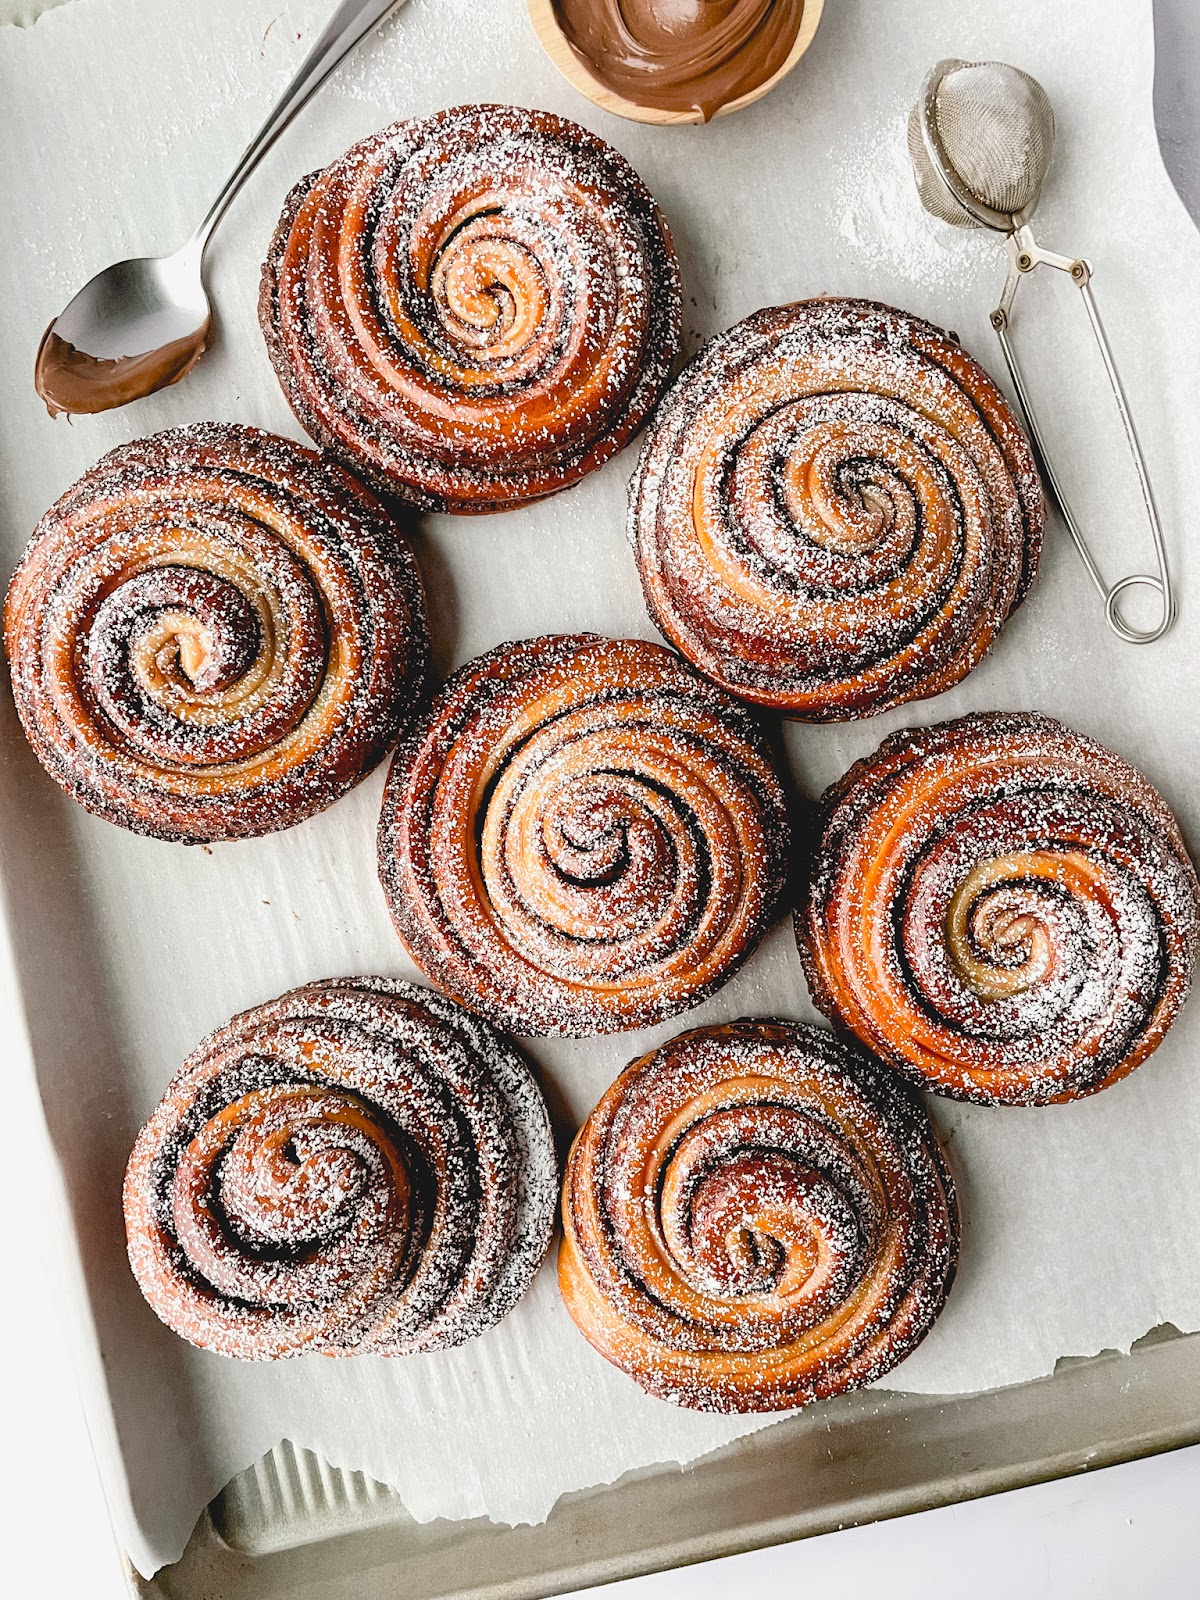
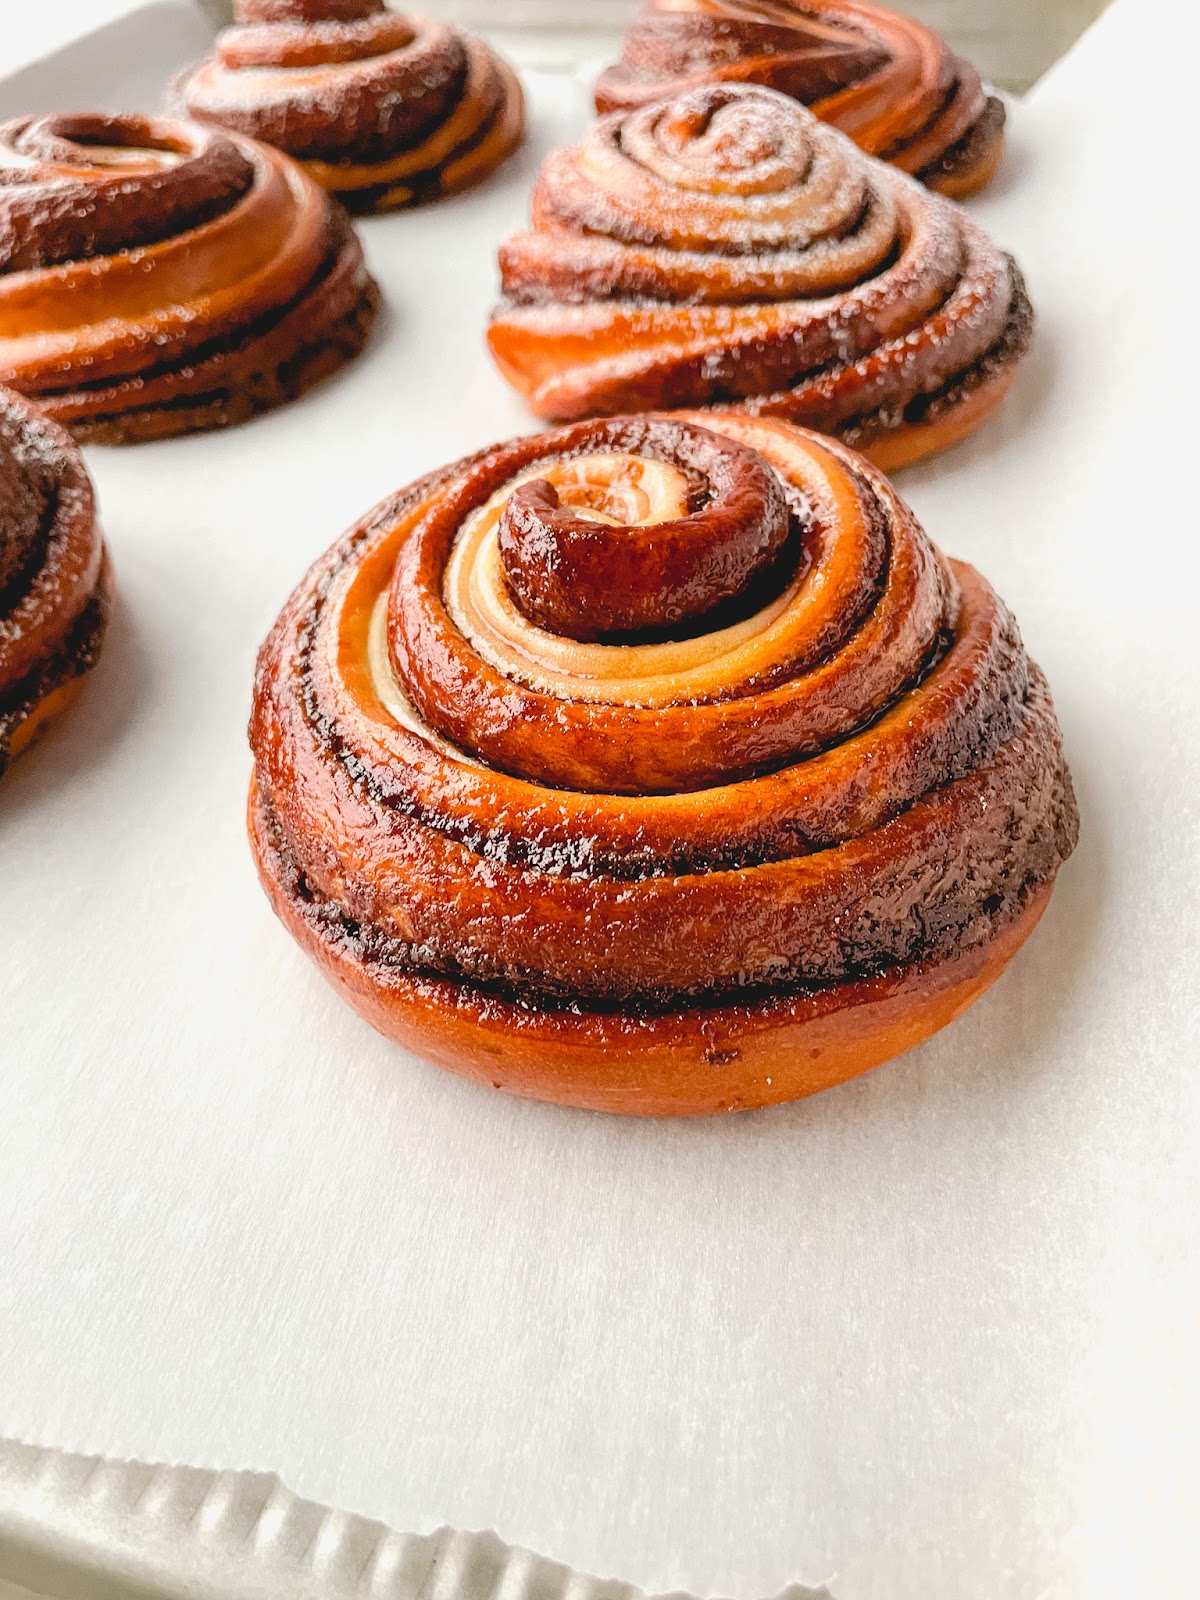
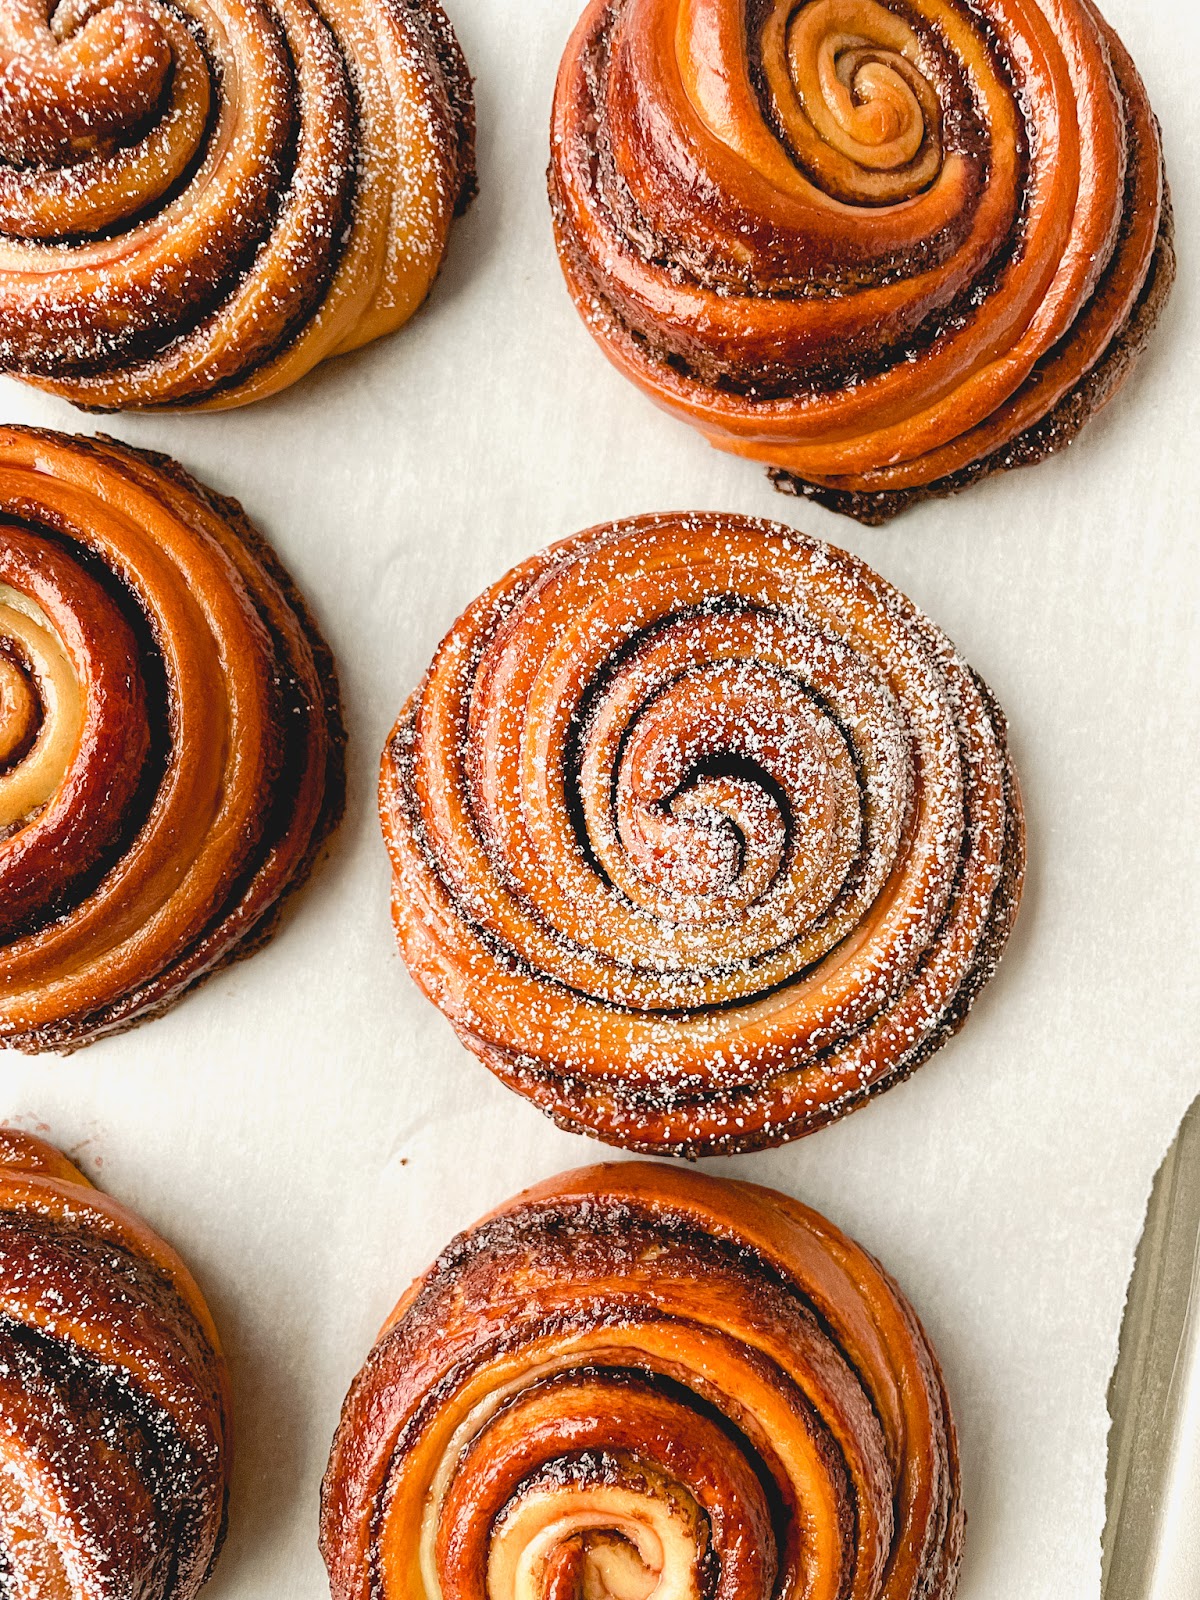
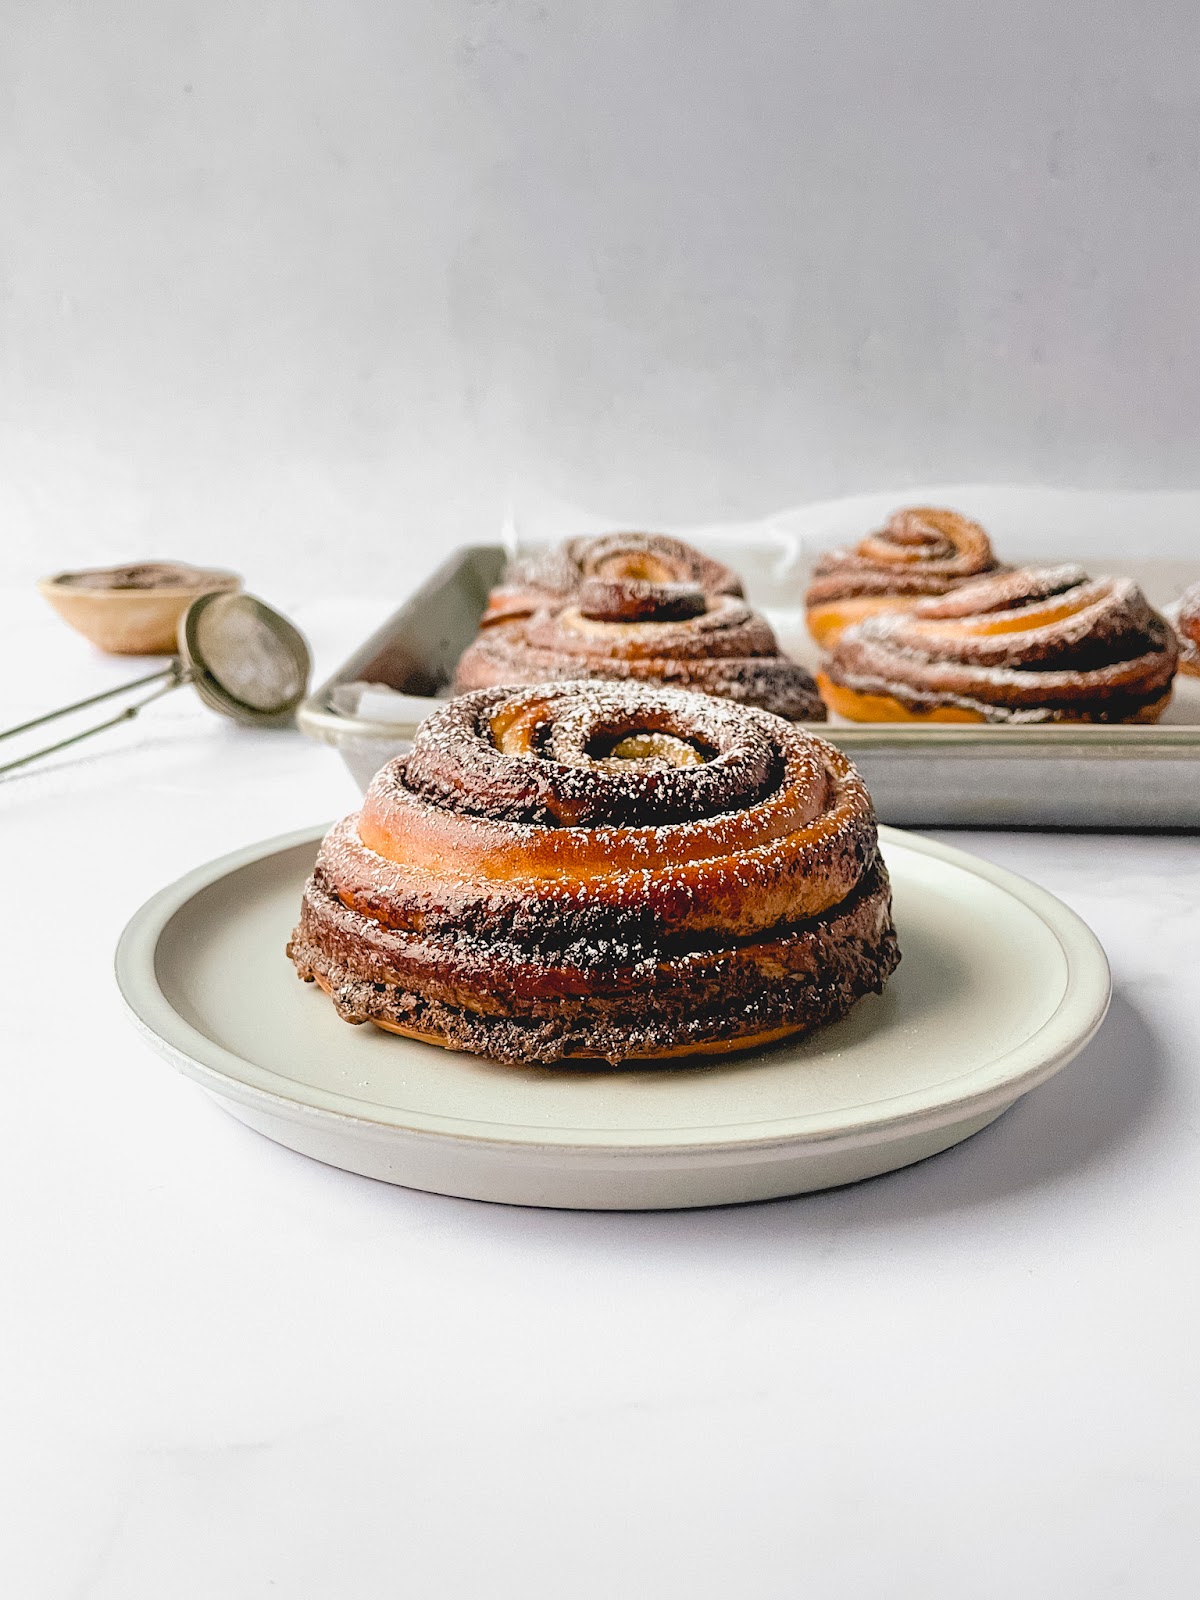
Soft, buttery brioche meets smooth chocolate hazelnut spread to create perfectly swirled Nutella Brioche Buns. Finished with a shiny, sweet raspberry simple syrup glaze and a dusting of powdered sugar.
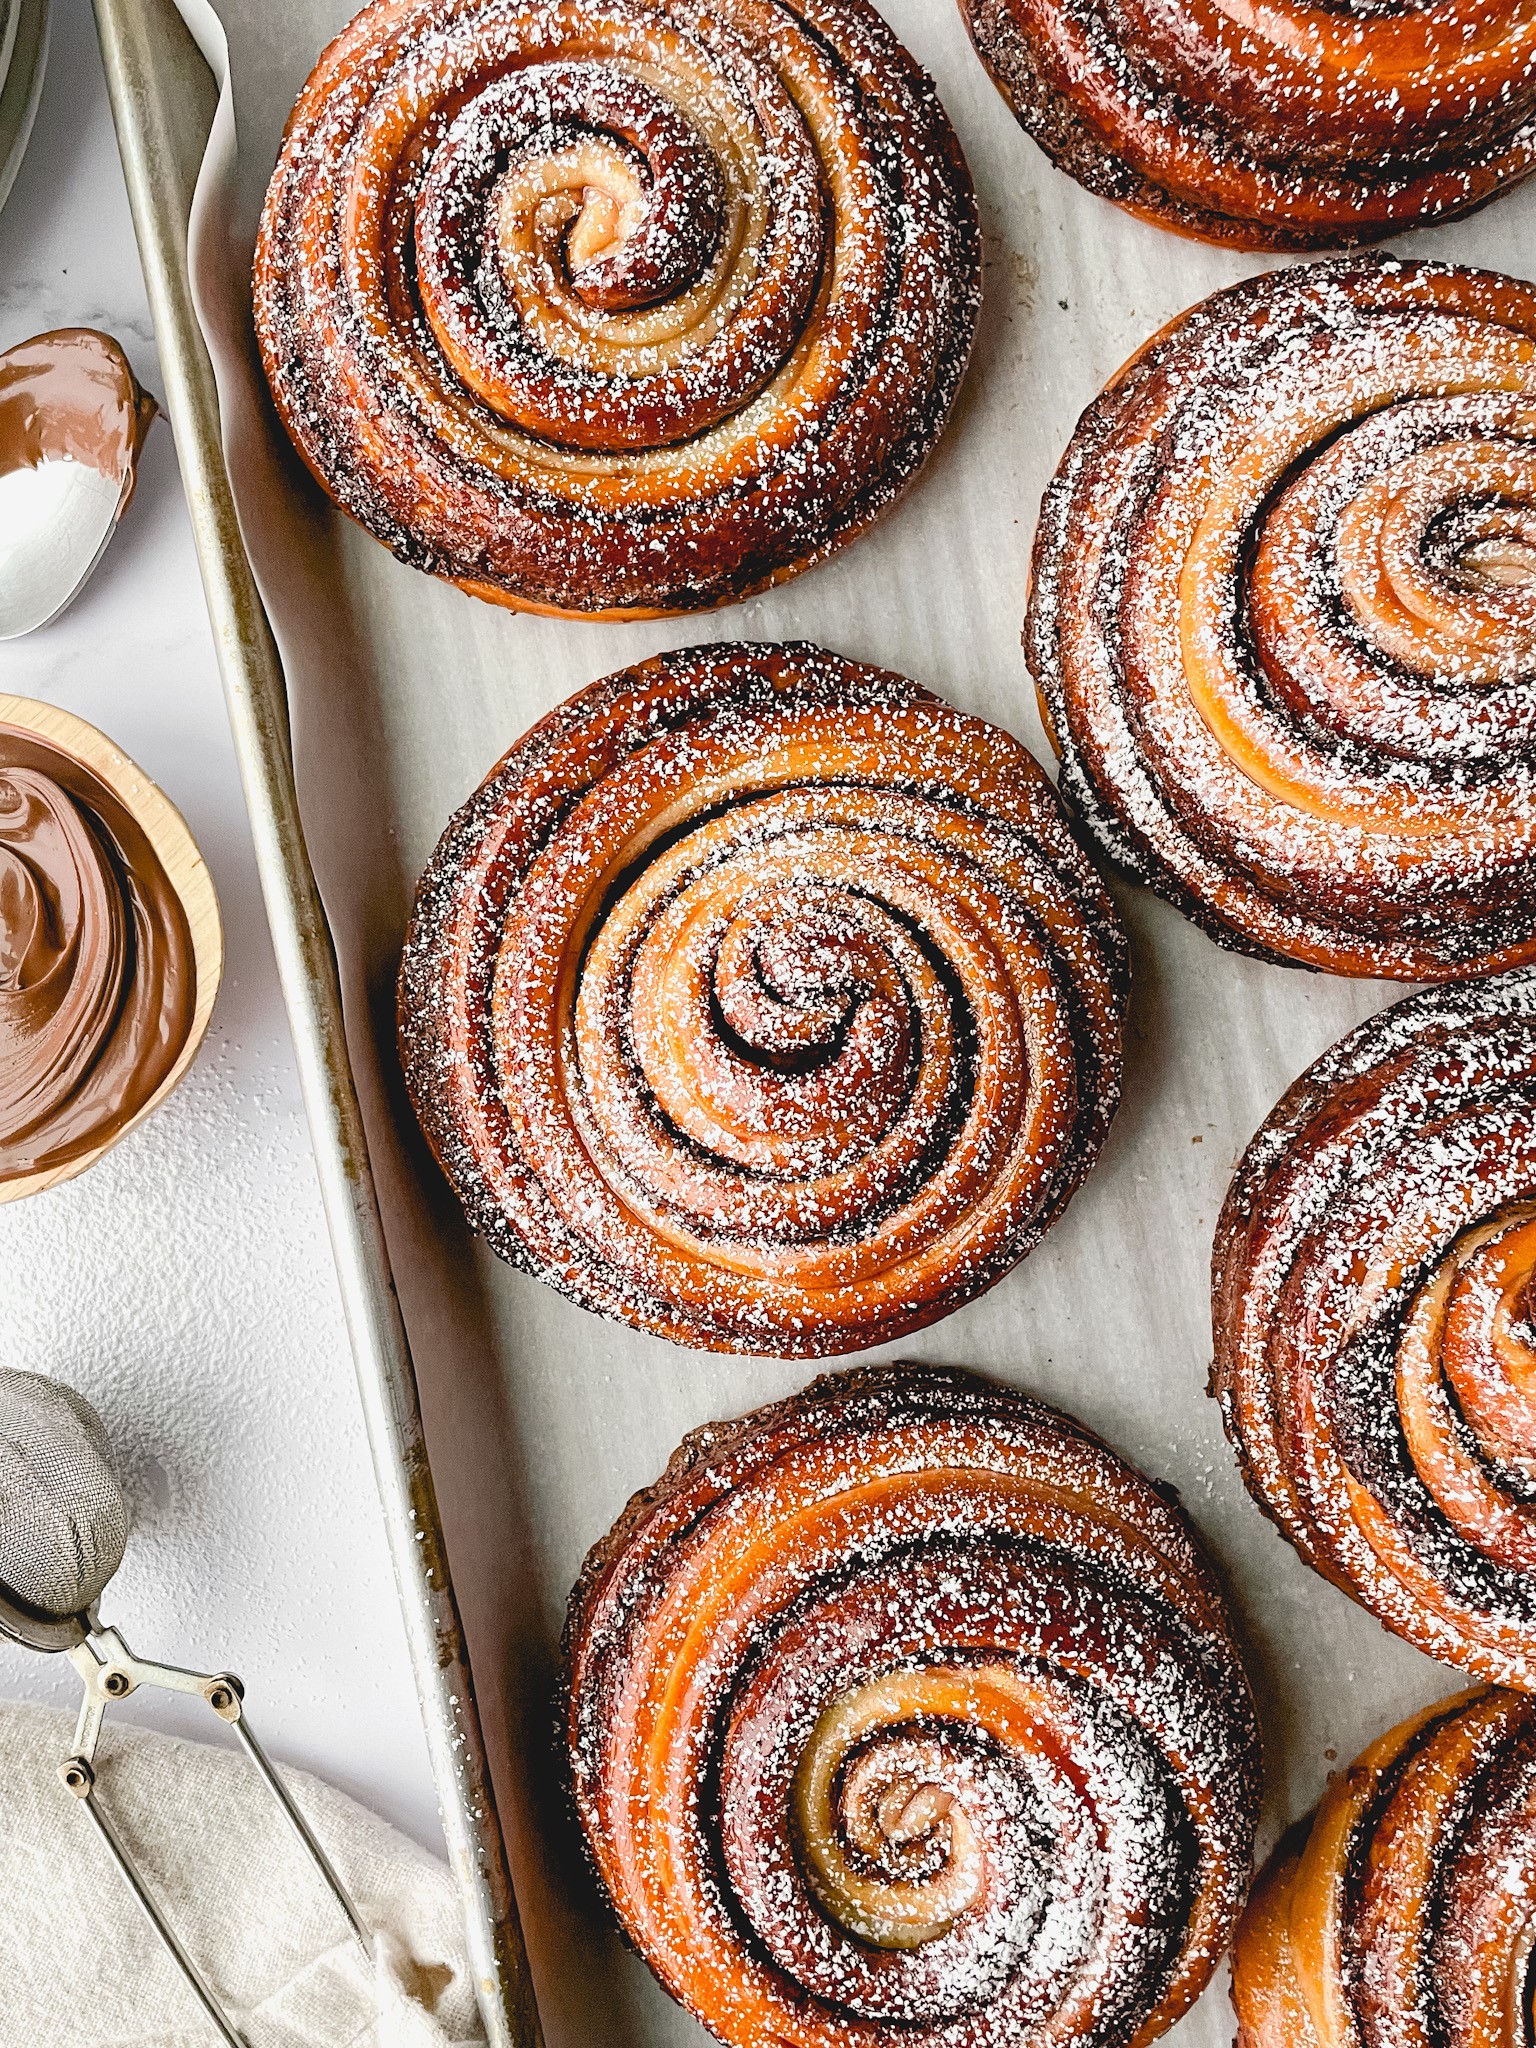
The first brioche pastry recipe I created was my Almond Cream Brioche Buns and they were such a hit with all of you! In fact, it was my #1 recipe of 2022 so I wanted to create another variation of these tasty buns. I knew the rich, buttery dough would pair well with chocolatey, nutty Nutella and I also wanted to add raspberry jam to the mix since chocolate and raspberry complement each other so well. So after several rounds of testing (which although tasty, were all a little too overpowering on the raspberry), I finally decided a simple glaze of raspberry simple syrup were all these buns needed. The glaze makes them nice and shiny and a light dusting of powdered sugar is the perfect finishing touch.
Brioche dough
If you’re familiar with brioche dough, you may notice that my recipe isn’t 100% traditional. While my recipe does have eggs and butter like a traditional one would, the fat ratio is not quite as high as you’d find in a classic loaf of brioche. My method is also a little different in the fact that I warm up the butter with the milk and add that to my mixer first, instead of the traditional method of adding softened butter slowly once the dough has come together. I find that with these variations you still get a lovely buttery, soft dough but it’s a little more manageable and easier to work with for the home baker!
Assembling Nutella Brioche Buns
One of my favorite parts about this recipe is the technique of assembling and shaping the buns. It creates the most beautiful swirled bun. It’s similar to a laminated dough which is created by folding butter into the dough and rolling it out to create several alternating layers. Instead of butter, I’ve done a small lamination with the Nutella filling to create more layers. I’ve kept it pretty simple though with just one series of folds.
- Roll out the dough. Once the dough has risen, you’re ready to roll. The dough should be rolled out to approximately 14” x 24”. This is important so you have an idea of how thin the dough needs to be and this will also make a difference in the size and shape of the final bun.
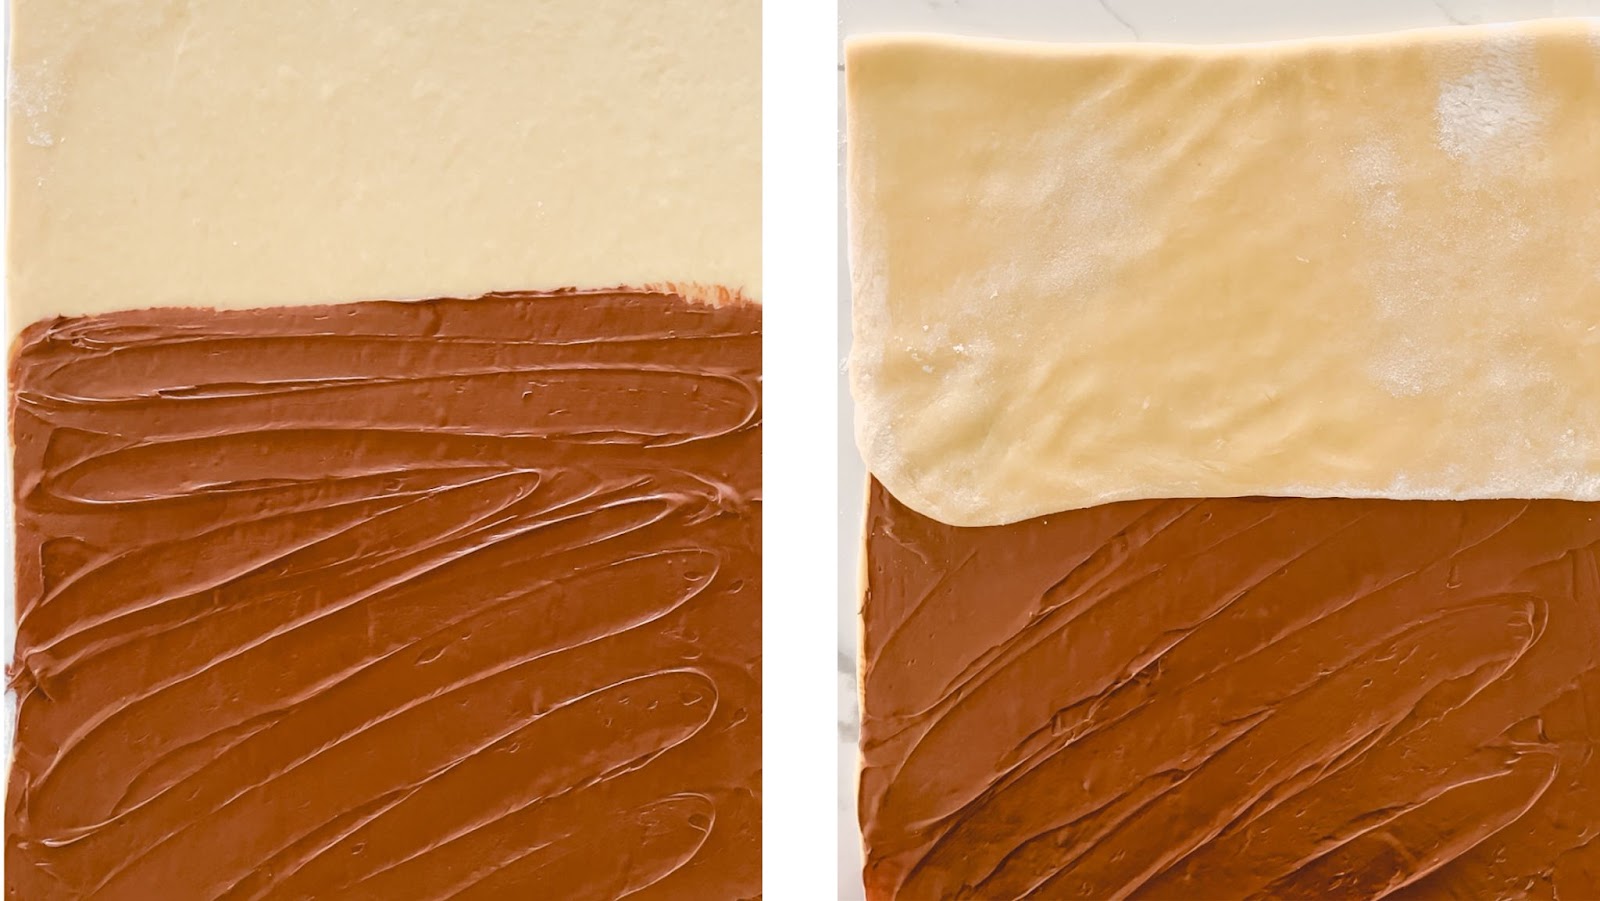
- Spread the Nutella. First, I warm up the Nutella in the microwave for about 15-20 seconds. This makes it easier to spread on the dough. If the Nutella is too cold or stiff, you’ll probably have a hard time getting it spread out and it may start to tear the dough. Spread it all the way to the edges but only on the bottom two-thirds of the dough, leaving the top third without filling.
- Fold the dough. This is where the “lamination” part takes place. Fold the top third of the dough (without filling) onto the middle third of the dough, then fold up the bottom third of the dough to create a long rectangle that now has 3 layers of dough. Roll out the rectangle again to make it about 8” wide by 14” long. Place the rectangle of dough on a sheet pan and refrigerate for about 15 minutes.
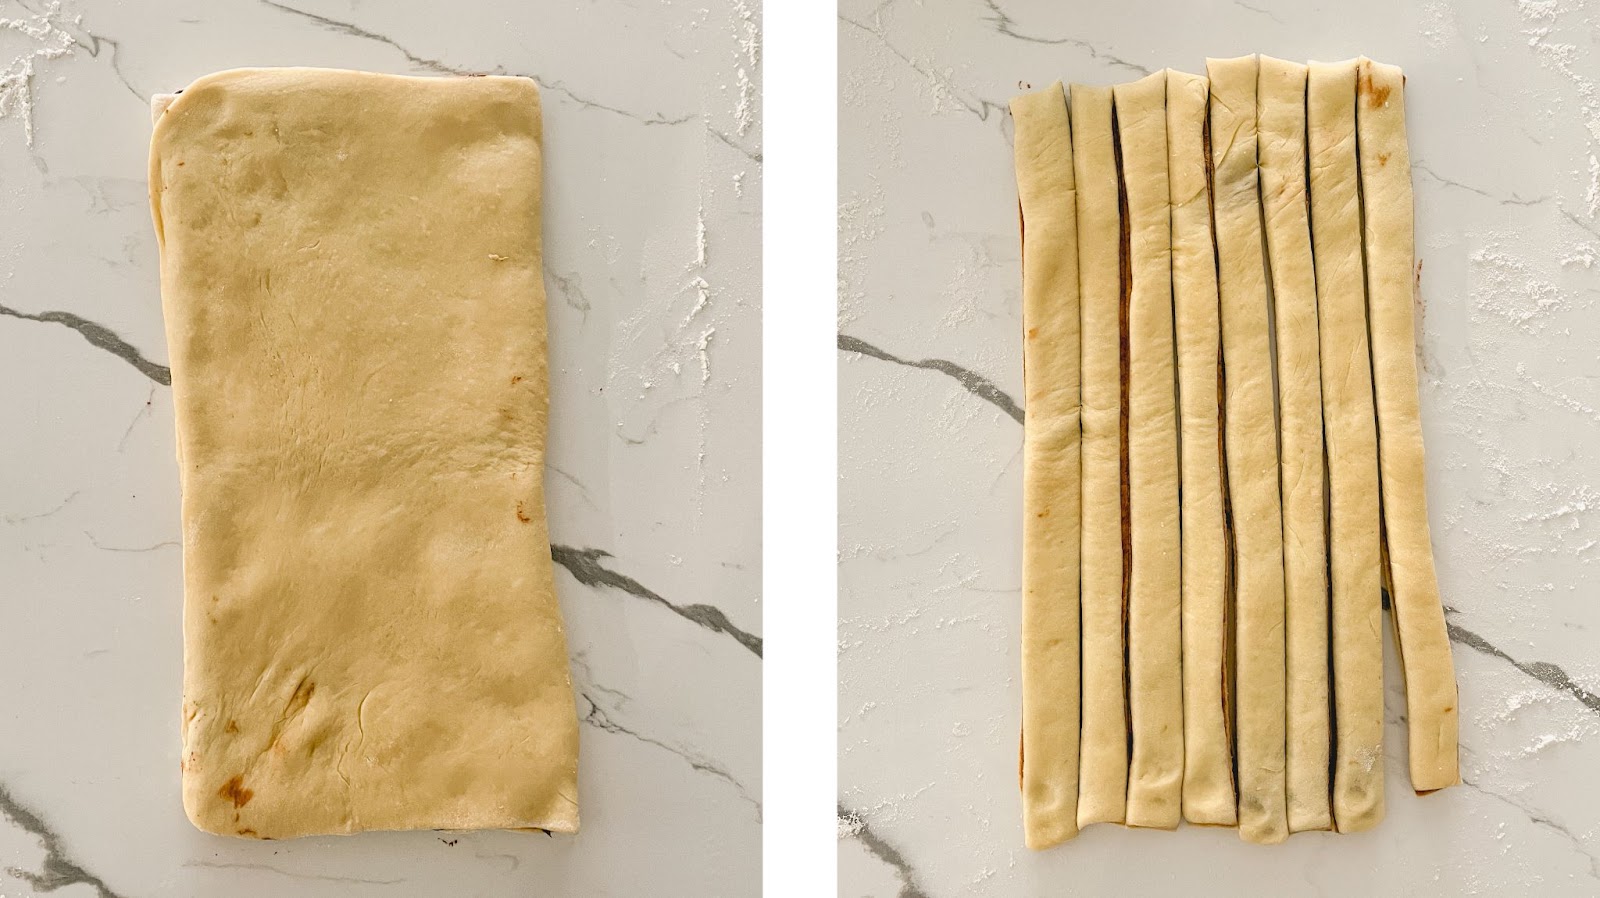
- Cut the dough into strips. After the dough has firmed up in the fridge, using a pizza cutter or pastry wheel, trim all 4 edges to create a clean, even rectangle. Then cut the rectangle lengthwise into 8 equal strips. Each strip should be about 1” wide. Following the previous measurements for the dough help as a good guideline to get you to the correct size for this step.
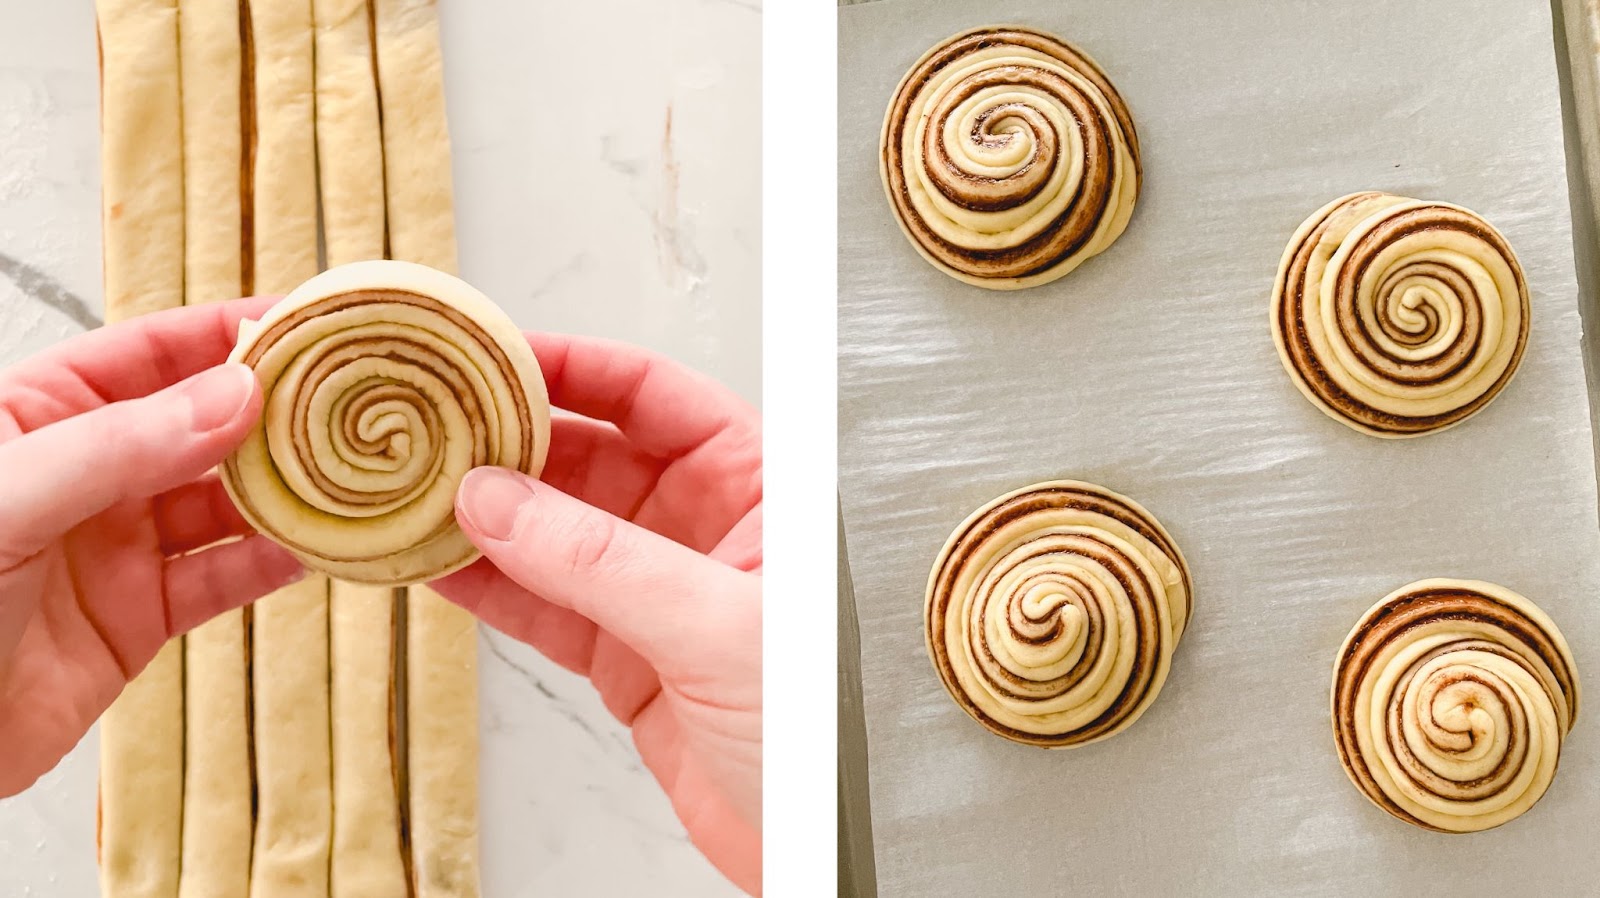
- Shape the buns. Take each strip and roll it up tightly from one end to the other, tucking the tail under the dough. Place the rolls on 2 sheet pans lined with parchment. Press down each on the top of each bun to slightly flatten them. Cover with plastic wrap and let the shaped buns rest for about 45 minutes – 1 hour until risen and puffy.
Tips for the Best Nutella Brioche Buns
- Use a kitchen scale. Weighing your ingredients when you bake will give you the most accurate and successful results. Bread recipes can be especially finicky so I always recommend investing in a kitchen scale. They’re pretty inexpensive and make such a difference to get a truly correct measurement every time. I use this one. You’ll notice that I include gram measurements in all my baking recipes!
- Measure the dough. I’ve included measurements for how wide and long the dough should be for the 2 different stages where the dough gets rolled out. These will be helpful so that when you go to cut the dough into strips for shaping the buns, you end up with 8 equal 1-inch-sized pieces. I like to use a metal ruler or tape measure for this.
- Refrigerate the dough. After you spread the Nutella on the dough, tri-fold it, and roll it out again, it’s helpful to pop it in the fridge for about 15 minutes. This will make the process of slicing the dough into 8 pieces much easier and less messy. The Nutella firms up in the fridge, along with the dough so the filling isn’t oozing out while you try to cut and shape it. To move the large piece of dough from your counter to the sheet pan, simply fold the rectangle in half, place it on the pan, then unfold it once it’s on the pan.
Nutella Brioche FAQs
How long does the dough need to proof/rise?
The rise time for any yeast dough will depend heavily on the temperature of the room. If the room is chilly, it will take longer for the dough to rise and if the room is warm, the dough will rise quickly. The proofing times in my recipes are just estimates and may still vary. For the best results, find a draft-free area for the dough, ideally a spot that’s a little warm. I like to place the bowl of dough in the microwave or in the oven to create a nice cozy area where the air is trapped, but make sure to keep it turned off!
How do I store these?
I highly recommend enjoying these Nutella Brioche Buns warm from the oven, or at least on the same day you bake them. A scratch-made pastry dough like this one will always have the best texture and flavor on the first day. If you want to keep them an extra day, store the baked buns in an airtight container at room temperature. Warm them up in the microwave or oven to make them soft again.
Can I freeze the buns?
I have had success freezing these buns but keep in mind that the freshness will be compromised a bit. I wrap each roll individually in plastic wrap and then put them in a zip-top bag in the freezer. Pull them out of the freezer to thaw either the night before serving or several hours ahead of time. They will be best after warming up in the microwave or oven.
More Breakfast Pastries You’ll Love
- Brown Butter Brioche Cinnamon Rolls
- Everything Bagel Bites
- Blueberry Streusel Coffee Cake Loaf
- Cinnamon Sugar Donut Muffins
- Apple Cheesecake Pop-Tart
Lastly, if you make this recipe, be sure to leave a comment below and tag @sweetkitchencravings on Instagram or TikTok. Or if Pinterest is more your style, you can save my recipes to your collection there. Happy baking!
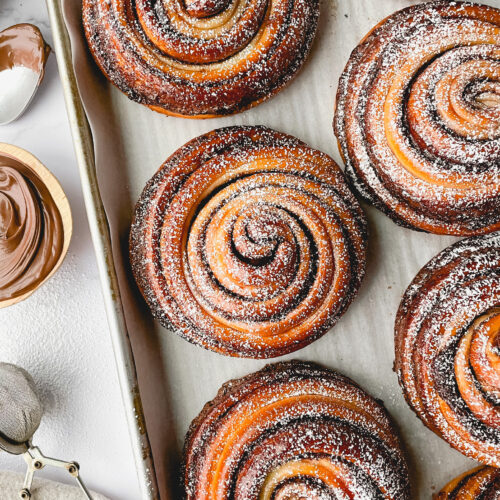
Nutella Brioche Buns
Ingredients
For the Brioche Dough
- ¾ cup (175g) whole milk
- 3 Tablespoons (40g) unsalted butter, cut into small cubes
- 2 teaspoons (9g) instant yeast
- 3 cups (390g) all-purpose flour
- ¼ cup (58g) granulated sugar
- ½ teaspoon salt
- 1 large egg, plus 1 large egg yolk
For the Filling
- ½ cup Nutella spread
For the Raspberry Simple Syrup
- ⅓ cup raspberry jam
- 2 Tablespoons water
Instructions
- Brioche Dough: In a small saucepan, add the milk and butter and heat on low until the mixture reaches 90°F. Add the milk and butter to the bowl of a stand mixer fitted with a dough hook attachment. Add the yeast to the bowl and give it a quick stir.
- Add the flour, sugar, salt, then eggs to the bowl. Mix on low speed until the dough comes together then scrape down the sides of the bowl. Continue mixing for about 5 minutes, until the dough has pulled away from the sides of the bowl and is smooth, not sticky. Scrape the sides and bottom of the bowl one or two times during the mixing process.
- Form the dough into a ball and place it in a large bowl greased with cooking spray or oil. Cover with plastic wrap and allow it to rise in a warm spot until doubled in size, about 1 – 1 ½ hours.
- Assembly: Line 2 baking sheets with parchment paper or silicone mats. Once the dough is ready, remove it from the bowl onto a lightly floured surface. Gently press out any air bubbles.
- With a rolling pin, roll out the dough into a rectangle measuring approximately 14” x 24”. Warm the Nutella in the microwave for about 15 – 20 seconds until spreadable. With the shorter end of the rectangle facing you, spread the Nutella onto the lower two-thirds of the dough, leaving one-third without filling.
- Fold the shorter ends of the dough into thirds like a letter. First, fold the top ⅓ of the dough (without filling) onto the middle ⅓ of the dough then fold the remaining ⅓ end over that, so you end up with 3 layers of dough. Gently roll out the dough again, until it measures about 8” wide and 14” long. Move the dough to a sheet pan and refrigerate for about 15 minutes.
- Remove the dough from the fridge and using a pizza cutter or pastry wheel, trim the 4 sides of the dough to create clean, even edges. Cut the dough in half lengthwise then cut each of those pieces in fourths, to create 8 long strips, each measuring about 1” wide.
- Starting at one end, roll each strip into a tight bun, tucking the tail underneath. Transfer the buns to the prepared pans and press down each bun to slightly flatten. Loosely cover with plastic wrap and allow the buns to rest in a warm spot until risen and puffy, about 45 minutes to 1 hour.
- Preheat oven to 350°F. Bake the buns for 18-20 minutes or until golden brown.
- Raspberry Simple Syrup: Combine the raspberry jam and water in a small saucepan and bring to a boil over low heat. Remove from heat and strain out the seeds with a fine mesh sieve. Brush the raspberry syrup over the warm buns.
- Dust the glazed brioche buns with powdered sugar, if desired, and enjoy!
Notes
- Storing: These brioche buns are best enjoyed the same day but can be stored in an airtight container at room temperature and refreshed the next day by warming them in the oven or microwave.


I love this recipe! The dough was really easy to make and work with, and I thought the assembly instructions were easy to follow. The raspberry simple syrup was an awesome touch and gave the buns a great taste and appearance! Highly recommend if you’re looking for a good sweet breakfast treat.
Thanks Meghan! I’m so glad to hear you enjoyed this recipe! 😊