Soft Gingerbread Cookies
These thick, soft gingerbread cookies are full of rich molasses flavor and warm spices. They’re a classic addition to your holiday baking lineup!
This post may contain affiliate links. Please read my full disclosure policy.
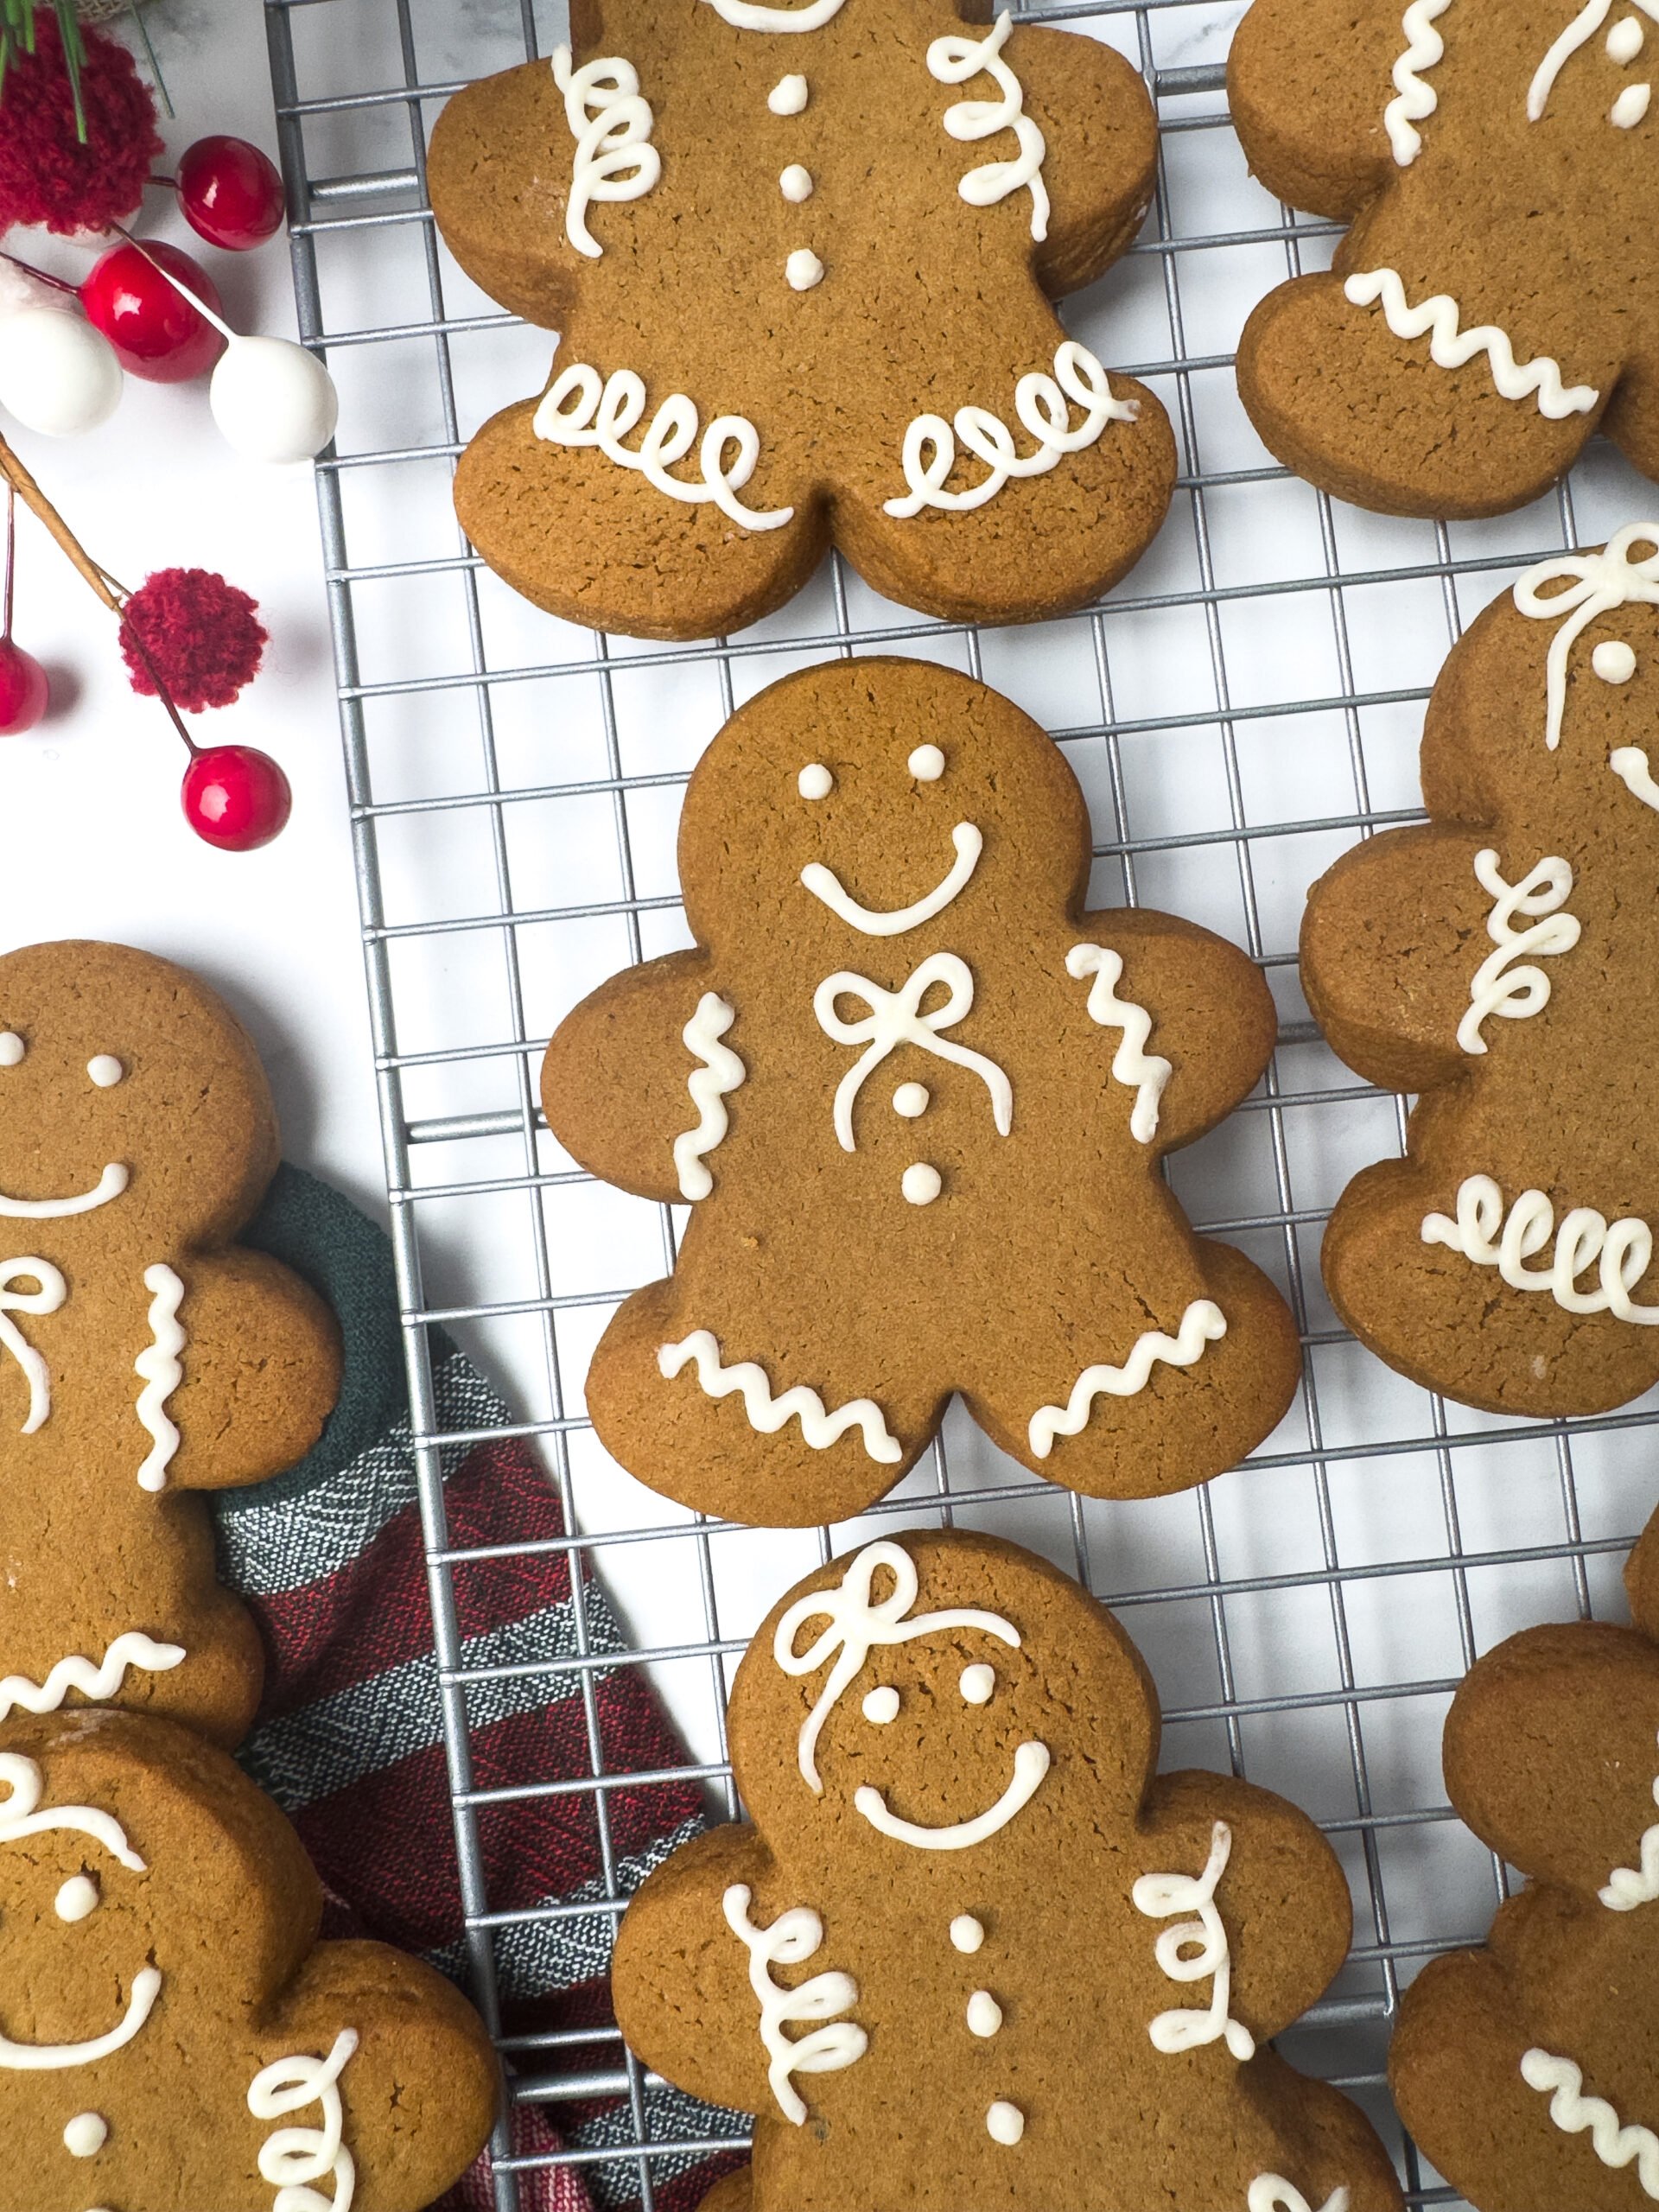
These Soft Gingerbread Cookies are full of warm spices and classic gingerbread flavor. A nostalgic favorite that is thick, tender, and chewy. Perfect for your Holiday cookie exchange or leaving out for Santa!
Key Ingredients
- Butter: Unsalted butter is always my go-to, but salted will work too.
- Brown Sugar: Helps make the cookies soft and chewy. You can use light or dark brown sugar. I prefer dark for even more molasses flavor.
- Molasses: Use a dark molasses, not blackstrap molasses. I like the “Grandma’s” brand that comes in a glass jar.
- Flour: All-purpose flour. I recommend weighing all your ingredients, but especially the flour, to get just the right dough consistency. You’ll also need a little extra for sprinkling when you roll out the dough.
- Spices: I like using cinnamon, ginger, and a bit of cloves for the best flavor combo.
See full recipe with the list of ingredients and measurements in the recipe card at the bottom of this post!

How To Make Gingerbread Cookies
- Mix. Make the cookie dough by creaming together butter and brown sugar in the bowl of a stand mixer, fitted with a paddle attachment. Add molasses, egg, and vanilla, and mix until combined. In another bowl, combine the flour, spices, baking soda, and salt. Add the dry ingredients to the mixing bowl and mix until the dough comes together. Knead byhand a few times to ensure all the ingredients are incorporated.
- Chill. Place the cookie dough onto a piece of plastic wrap and press it into a disc. Allow the dough to chill in the fridge for at least 2 hours before rolling it out and cutting shapes.
- Roll. Lightly flour your surface and the top of the dough. Roll out the dough to ⅜” thick, then use a cookie cutter to cut shapes. Add the cookies to a baking pan lined with parchment paper. Push together the scraps and continue to re-roll the dough 2 or 3 more times until there is no more dough remaining.
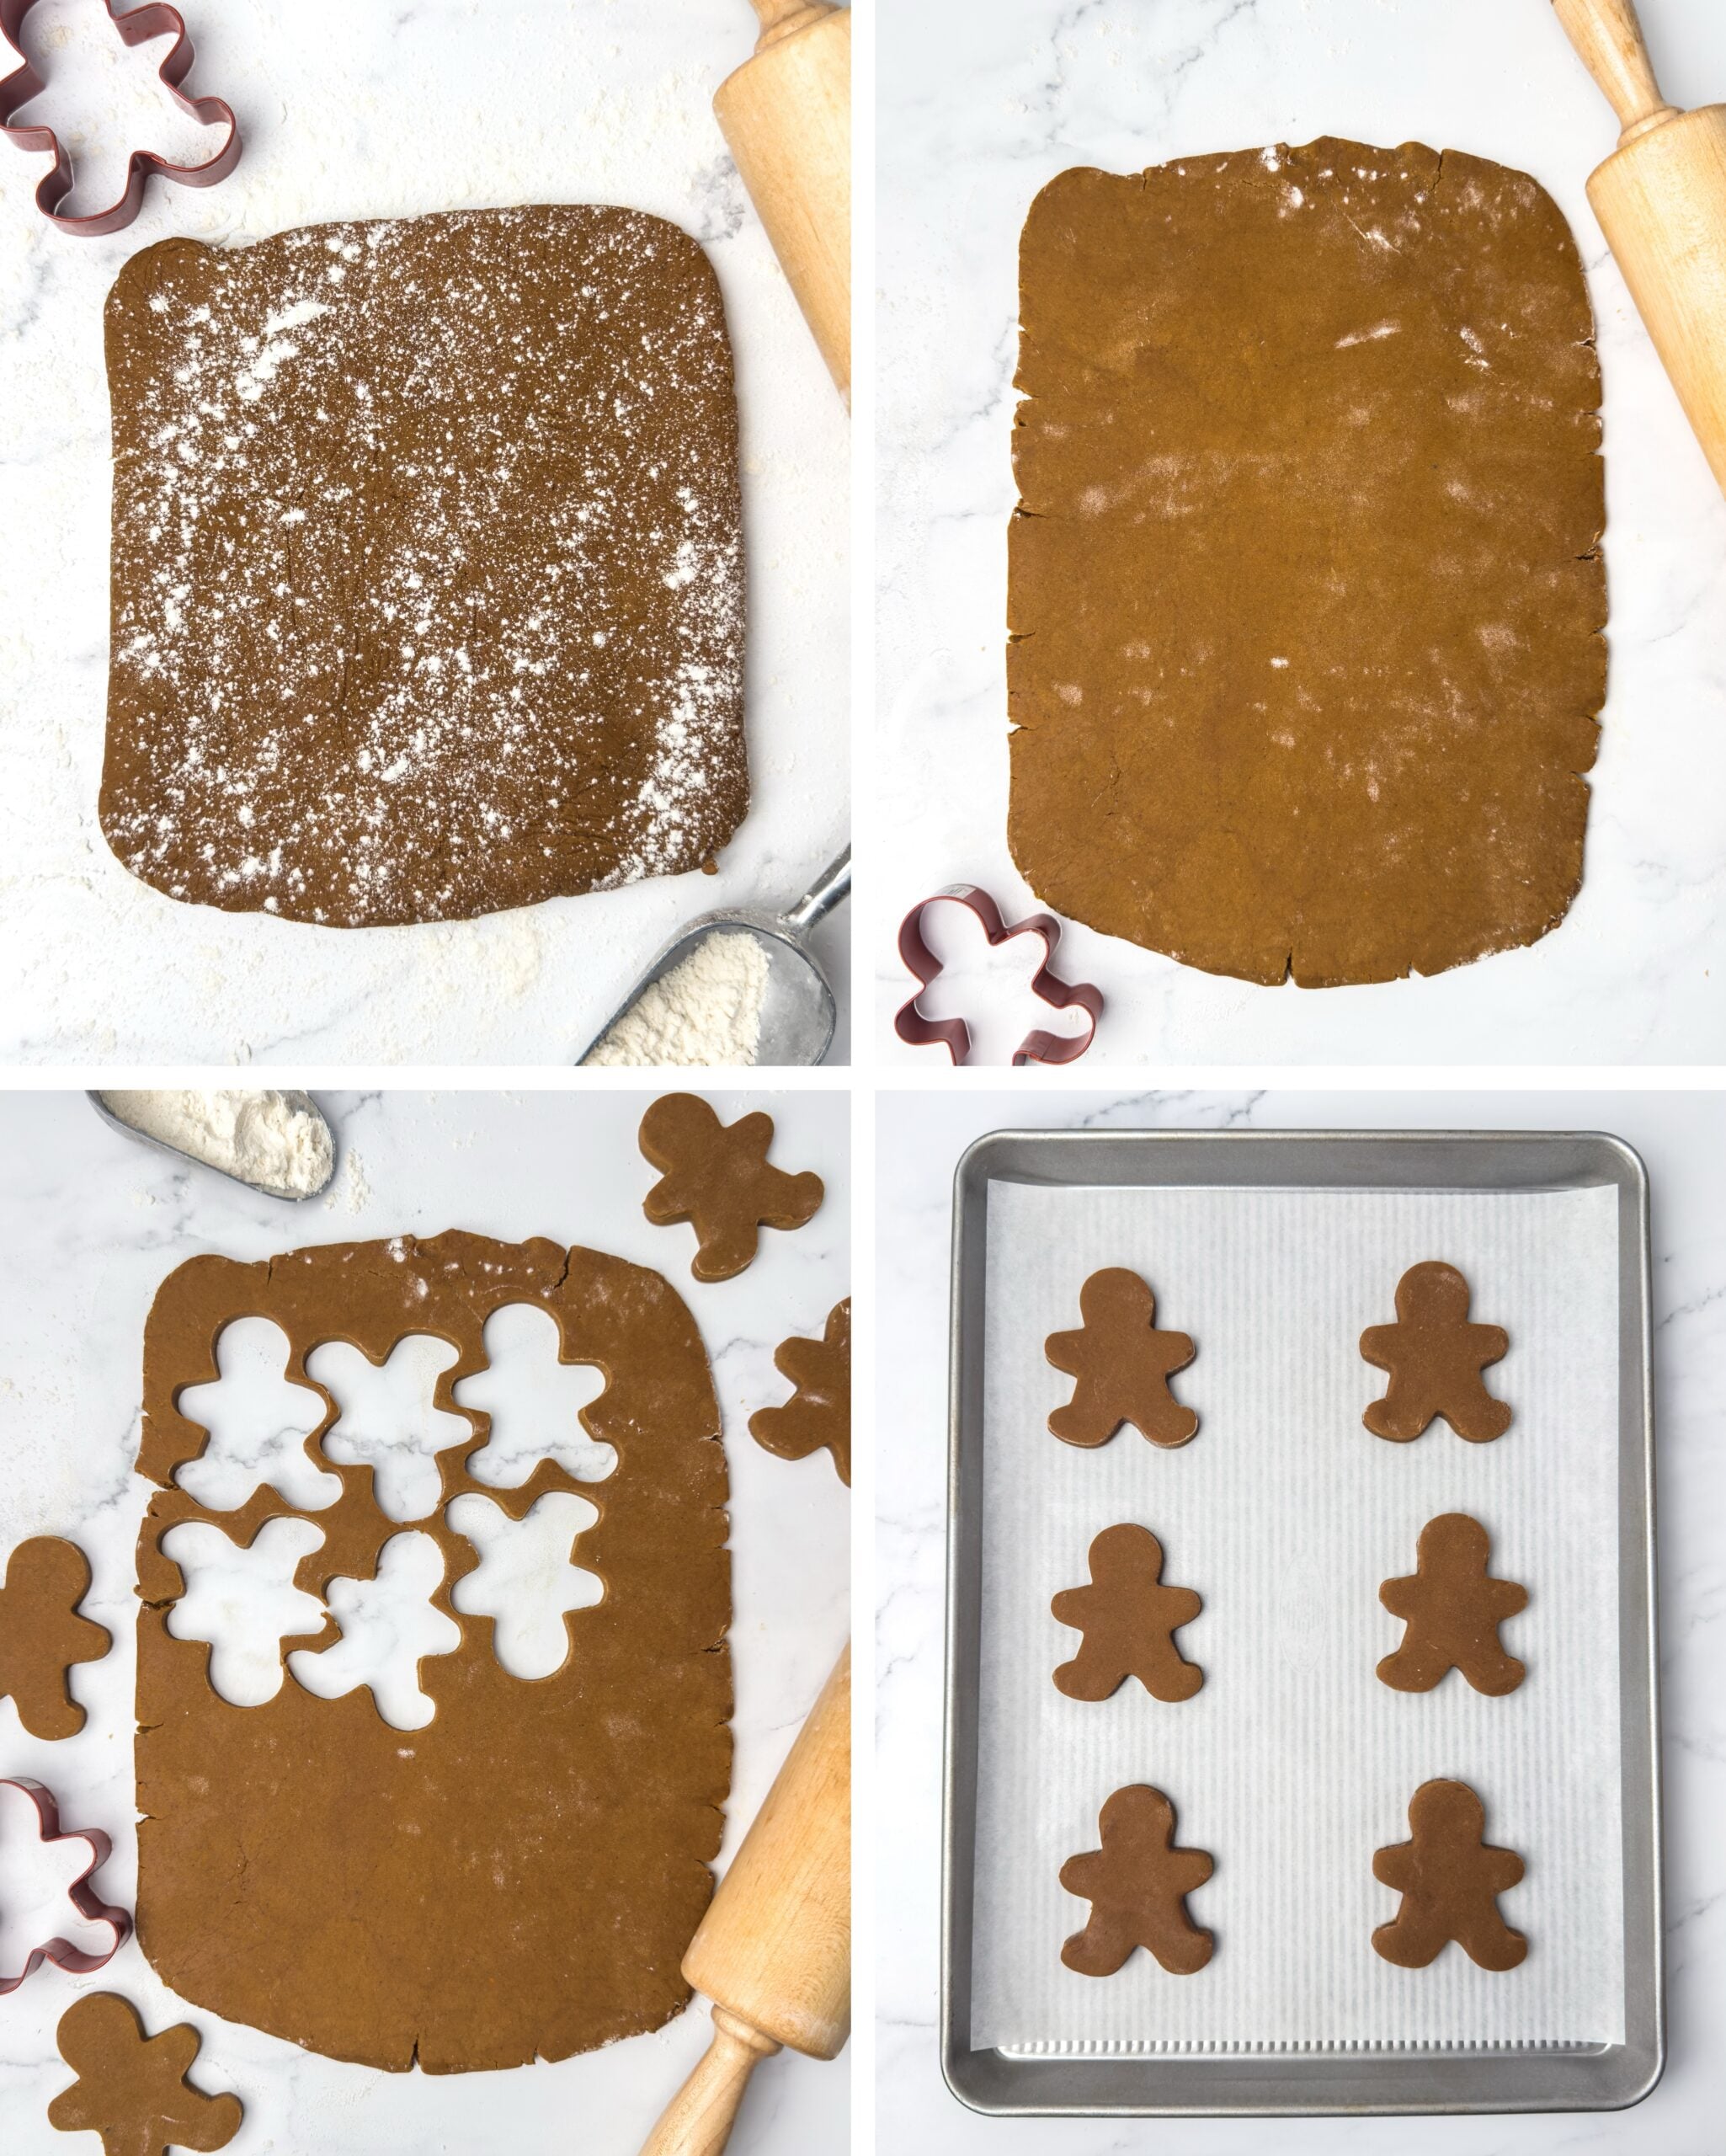
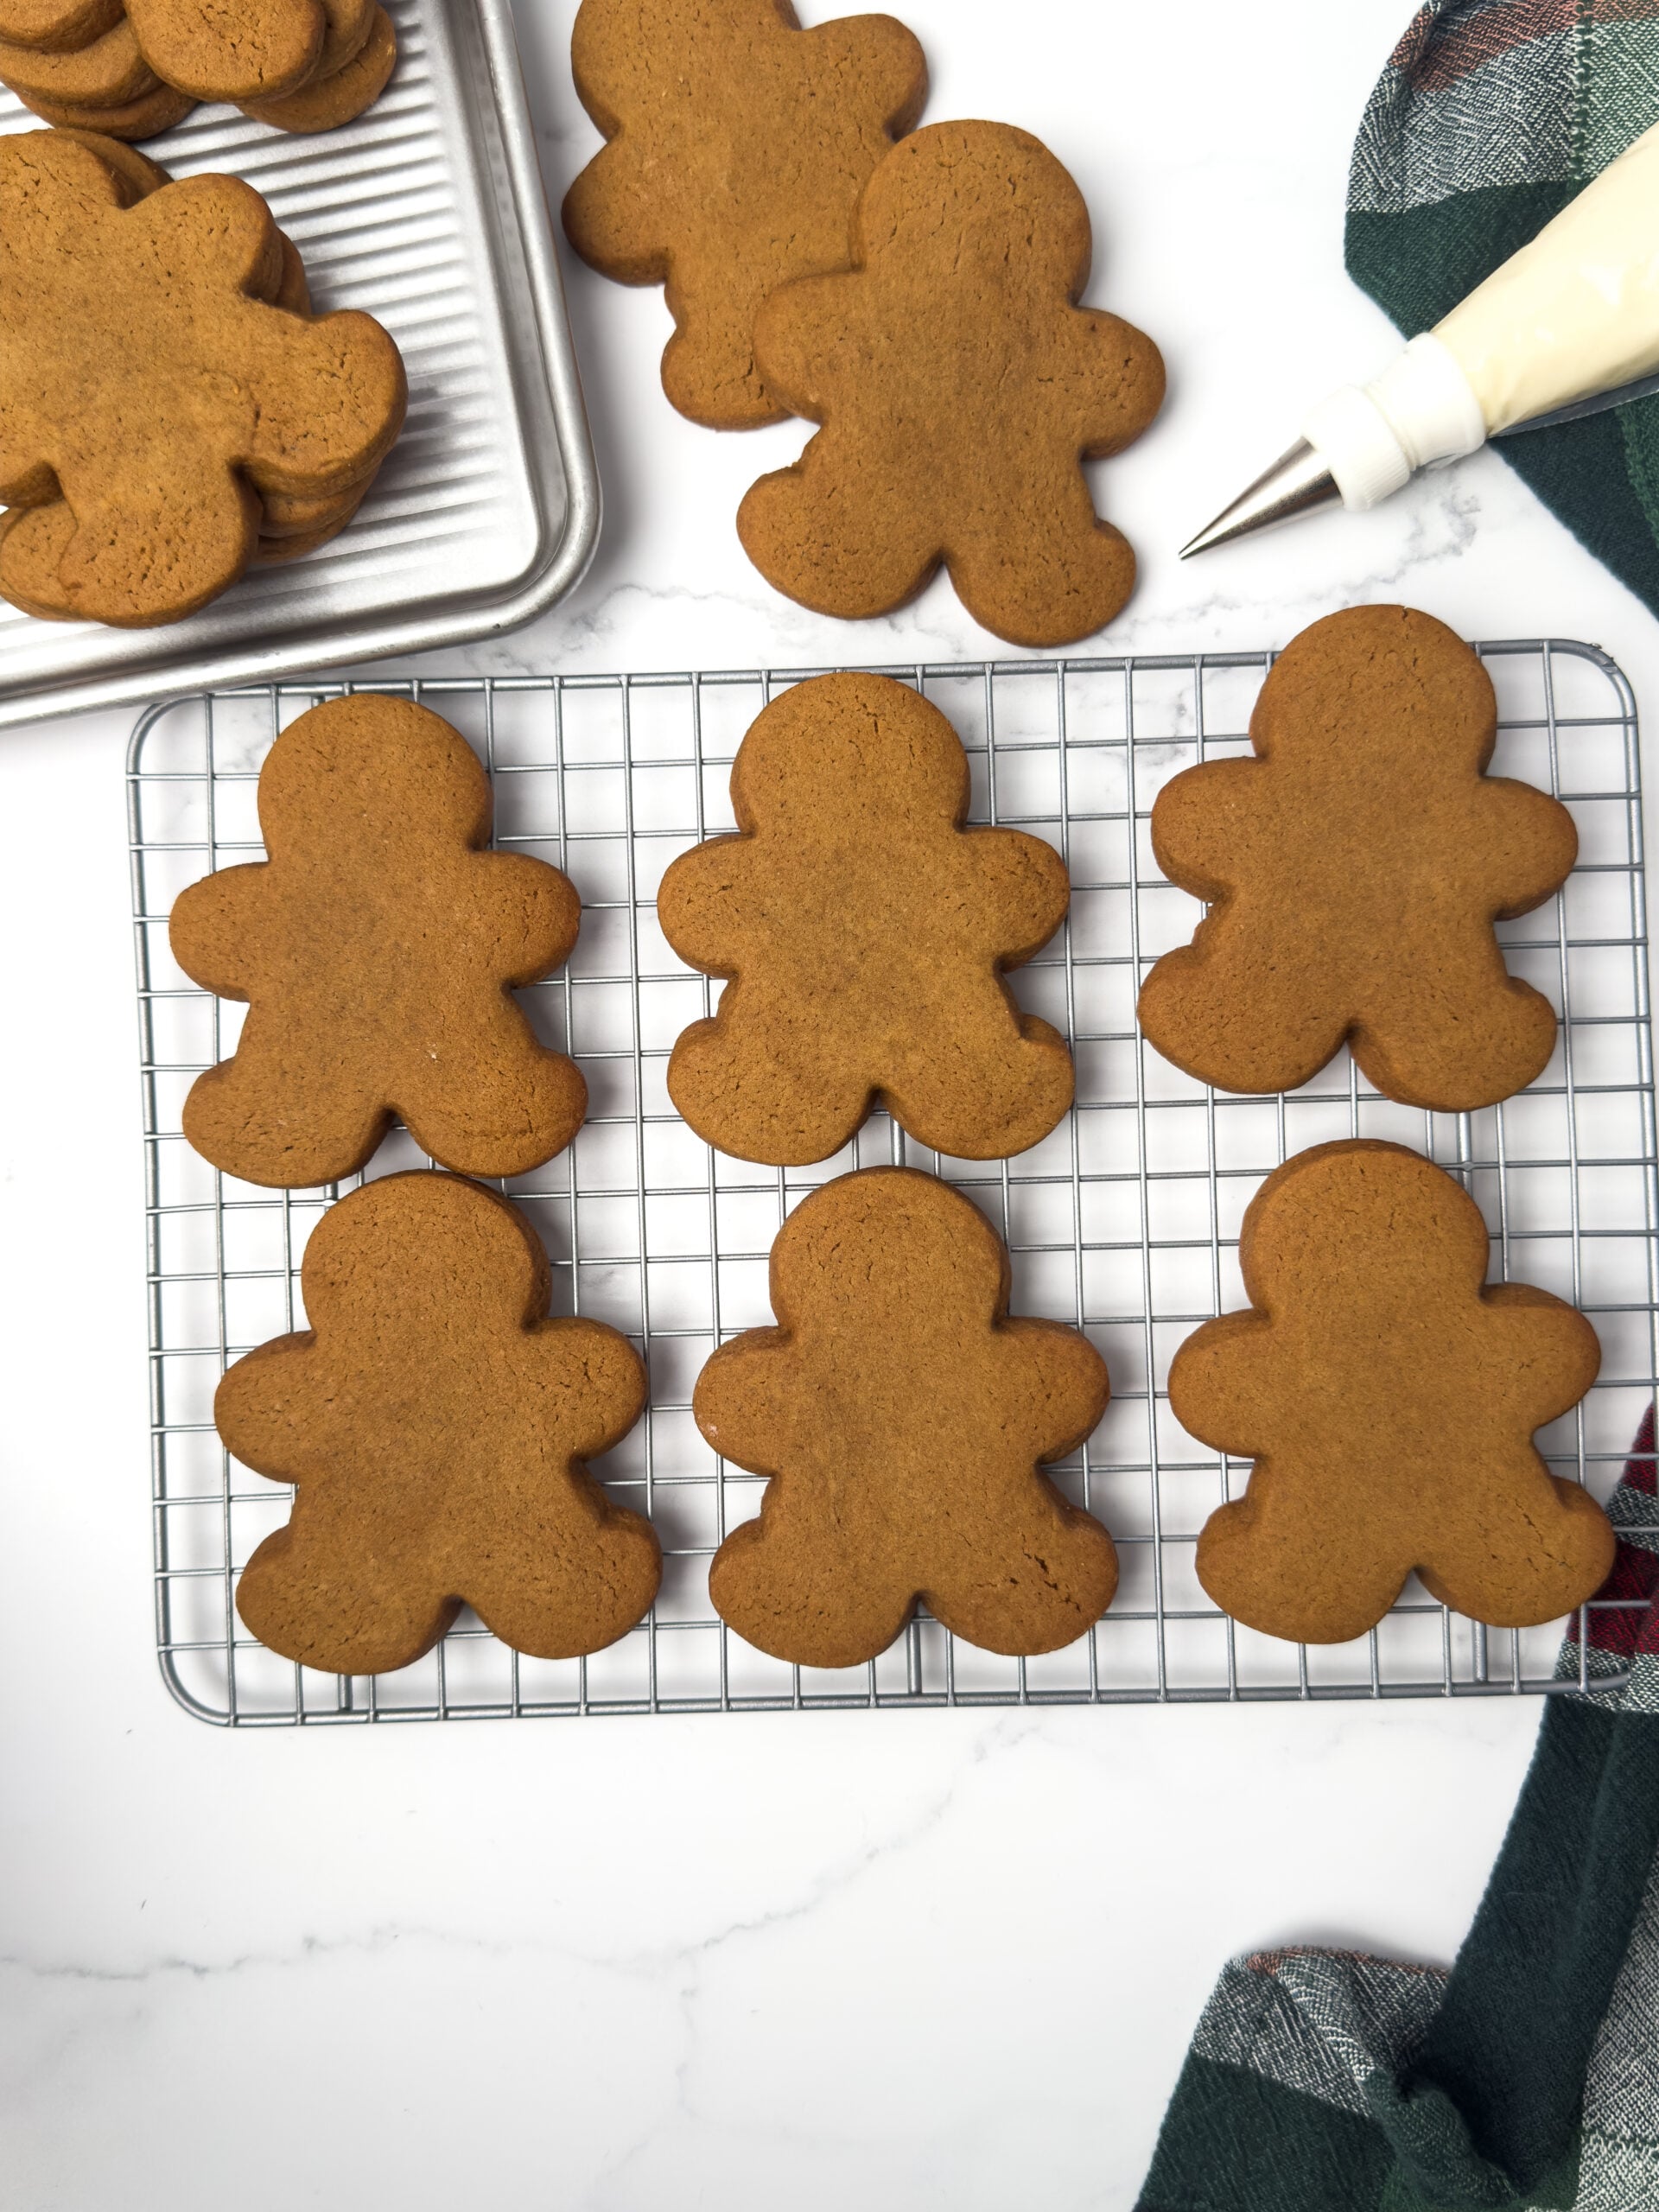
- Chill again & Bake. Place the baking sheets of cookies in the fridge and allow them to chill for 10-15 minutes before baking. Once chilled, bake the cookies at 350°F for 8-10 minutes, until the cookies are puffed and no longer look wet on top.
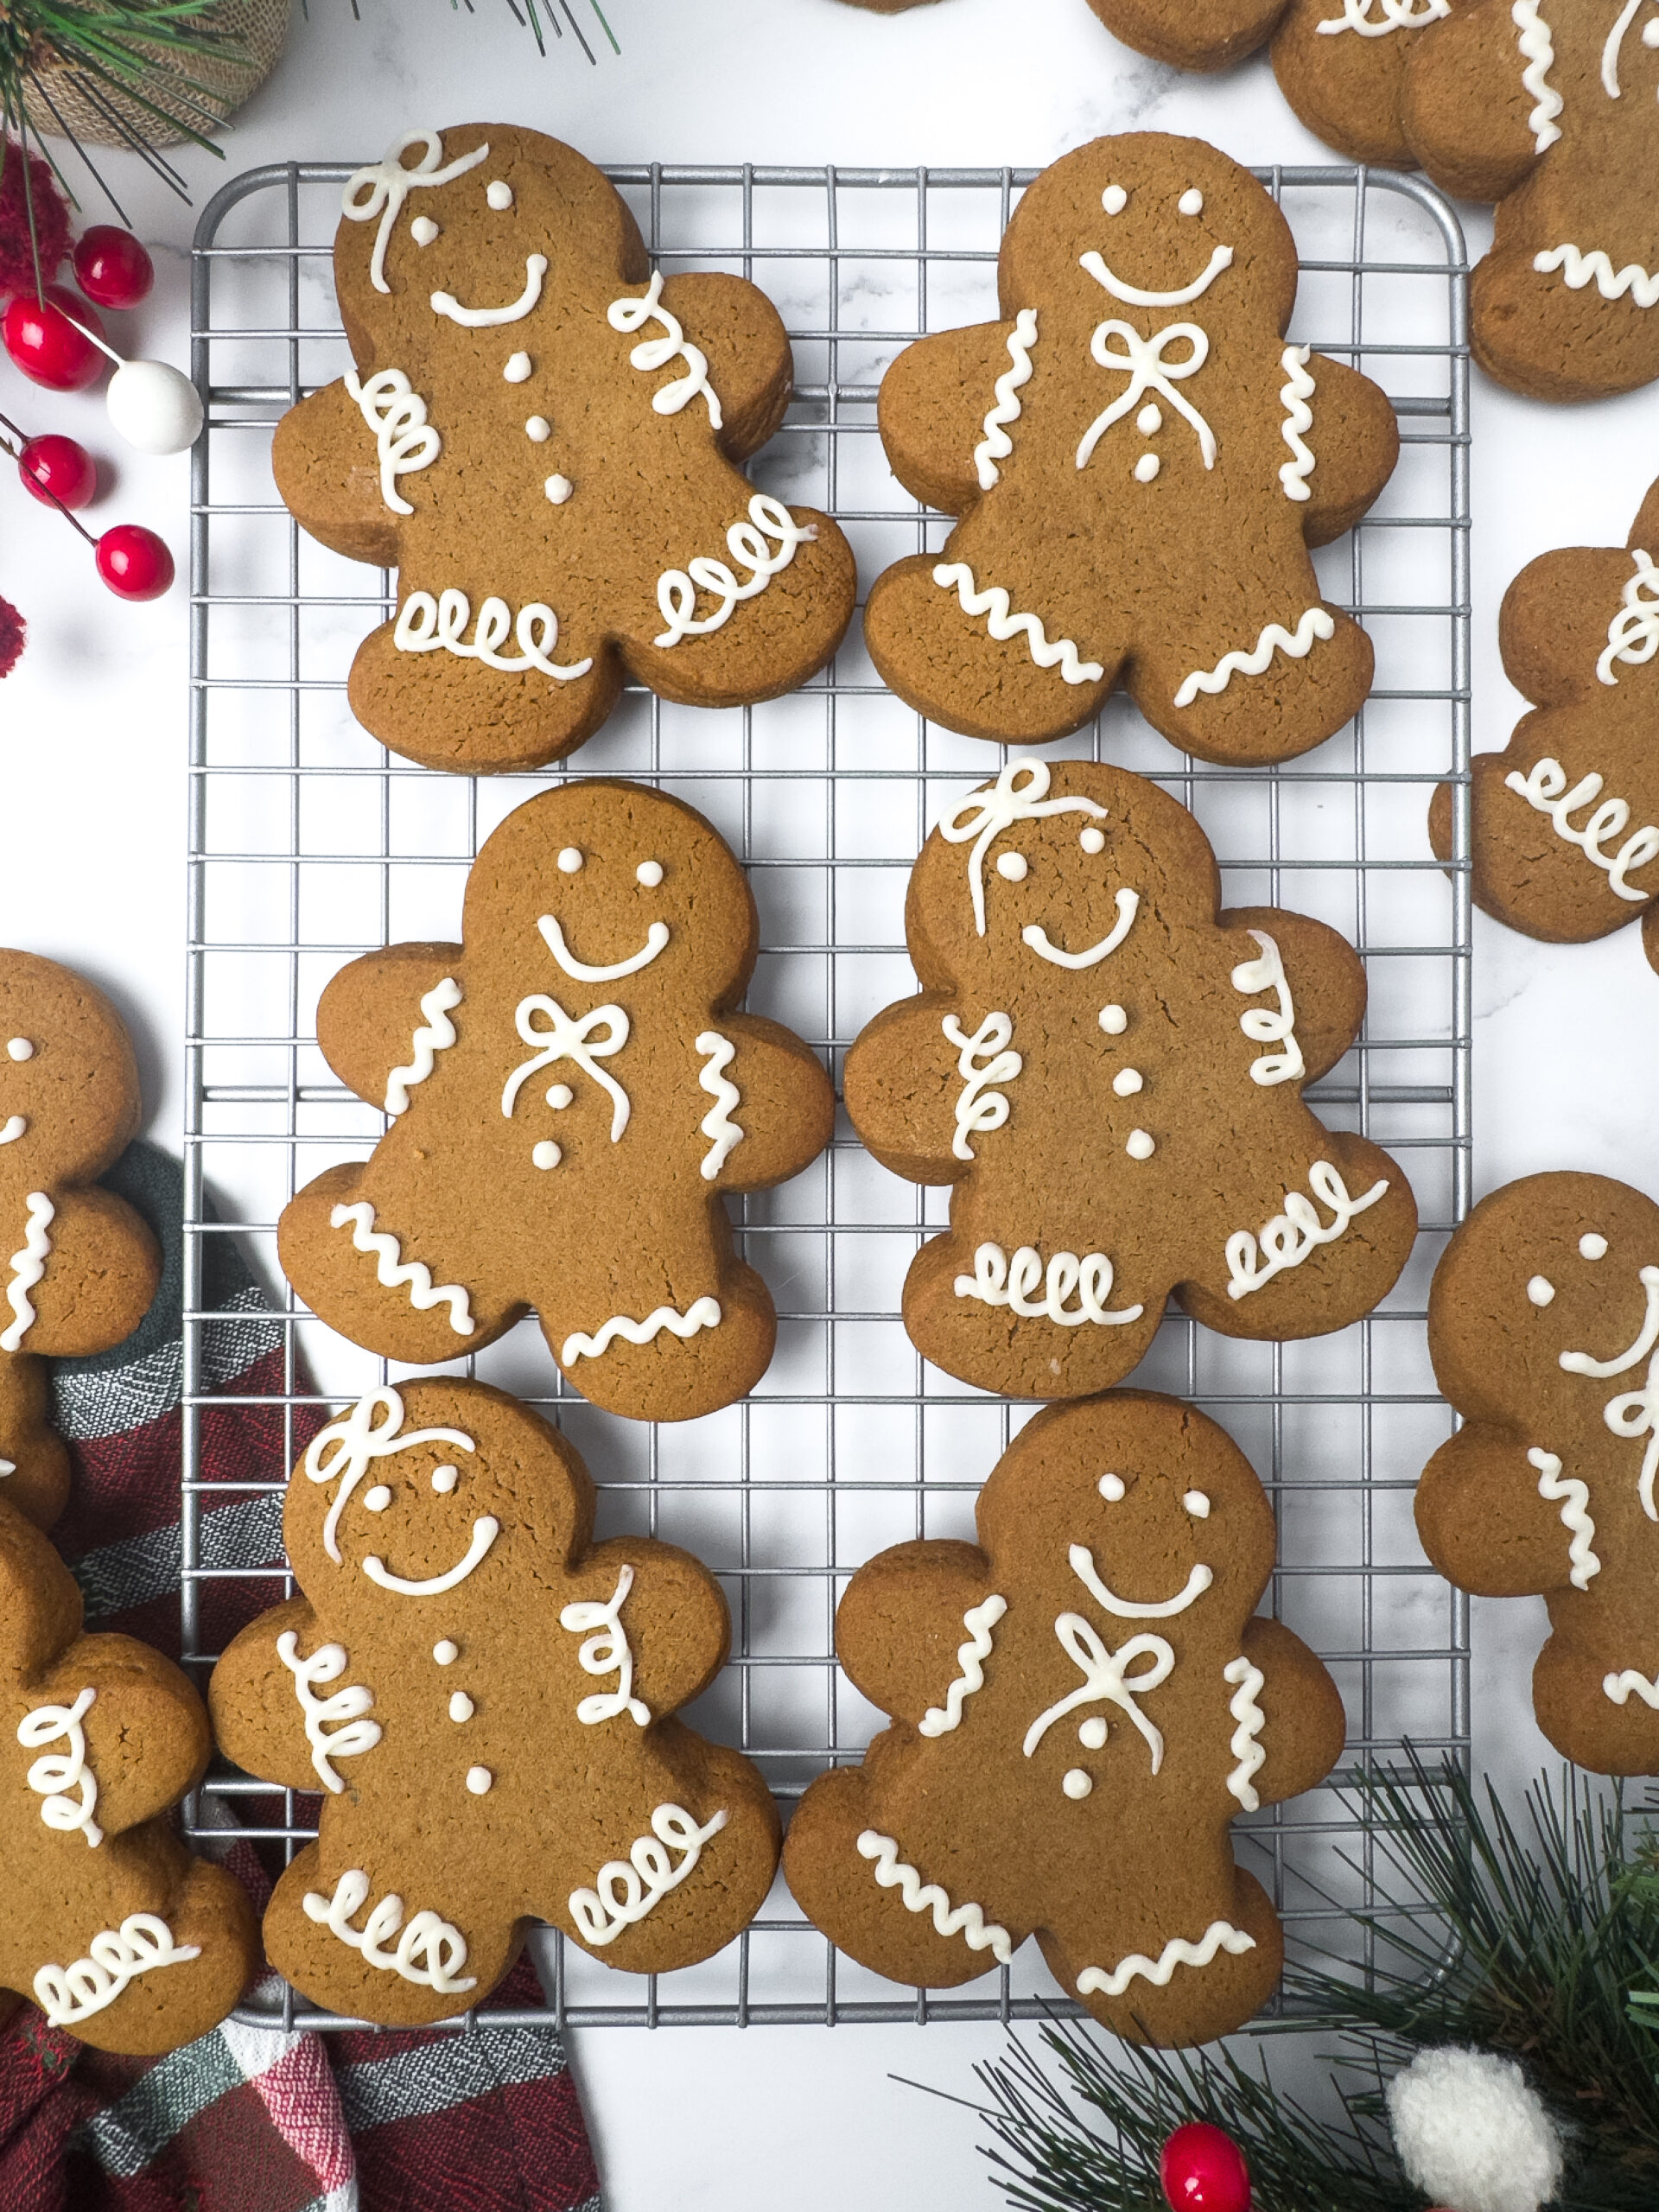
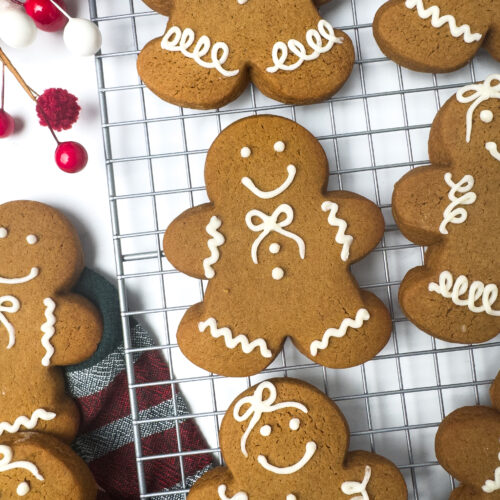
- Decorate. Allow the cookies to cool completely before decorating. Pipe buttercream frosting designs onto the cookies and enjoy!
Favorite Tools


Baking Tips
- Chill the dough. Don’t skip this step. Chilling the disc of dough and chilling the shapes before baking will prevent the dough from spreading too much and help the cookies keep their shape.
- Sprinkle flour. To prevent the dough from sticking, lightly sprinkle flour on the surface that you are rolling out the dough on, as well as on top of the dough, so the rolling pin doesn’t stick. It also helps to move the disc of dough as you roll and sprinkle more flour under and on top of it as needed, to prevent it from sticking to your surface. If your cookie cutter is sticking, dip the cutter in a bit of flour first.
- Use rolling pin guides. To help roll out the dough to a perfectly even ⅜” thickness, I recommend using a rolling pin with rings/thickness guides. These are typically sold as a set with the rolling pin and the guides fit right on the ends of the rolling pin, allowing you to choose your desired thickness. Square wooden dowels also work great if you don’t want to buy a whole new rolling pin. Simply place the dowels on either side of the disc of dough while rolling it out, until the rolling pin rests on top of the dowels. Get the size of dowel that is your desired thickness (⅜” in this case) – you can typically find these at craft stores and hardware stores.
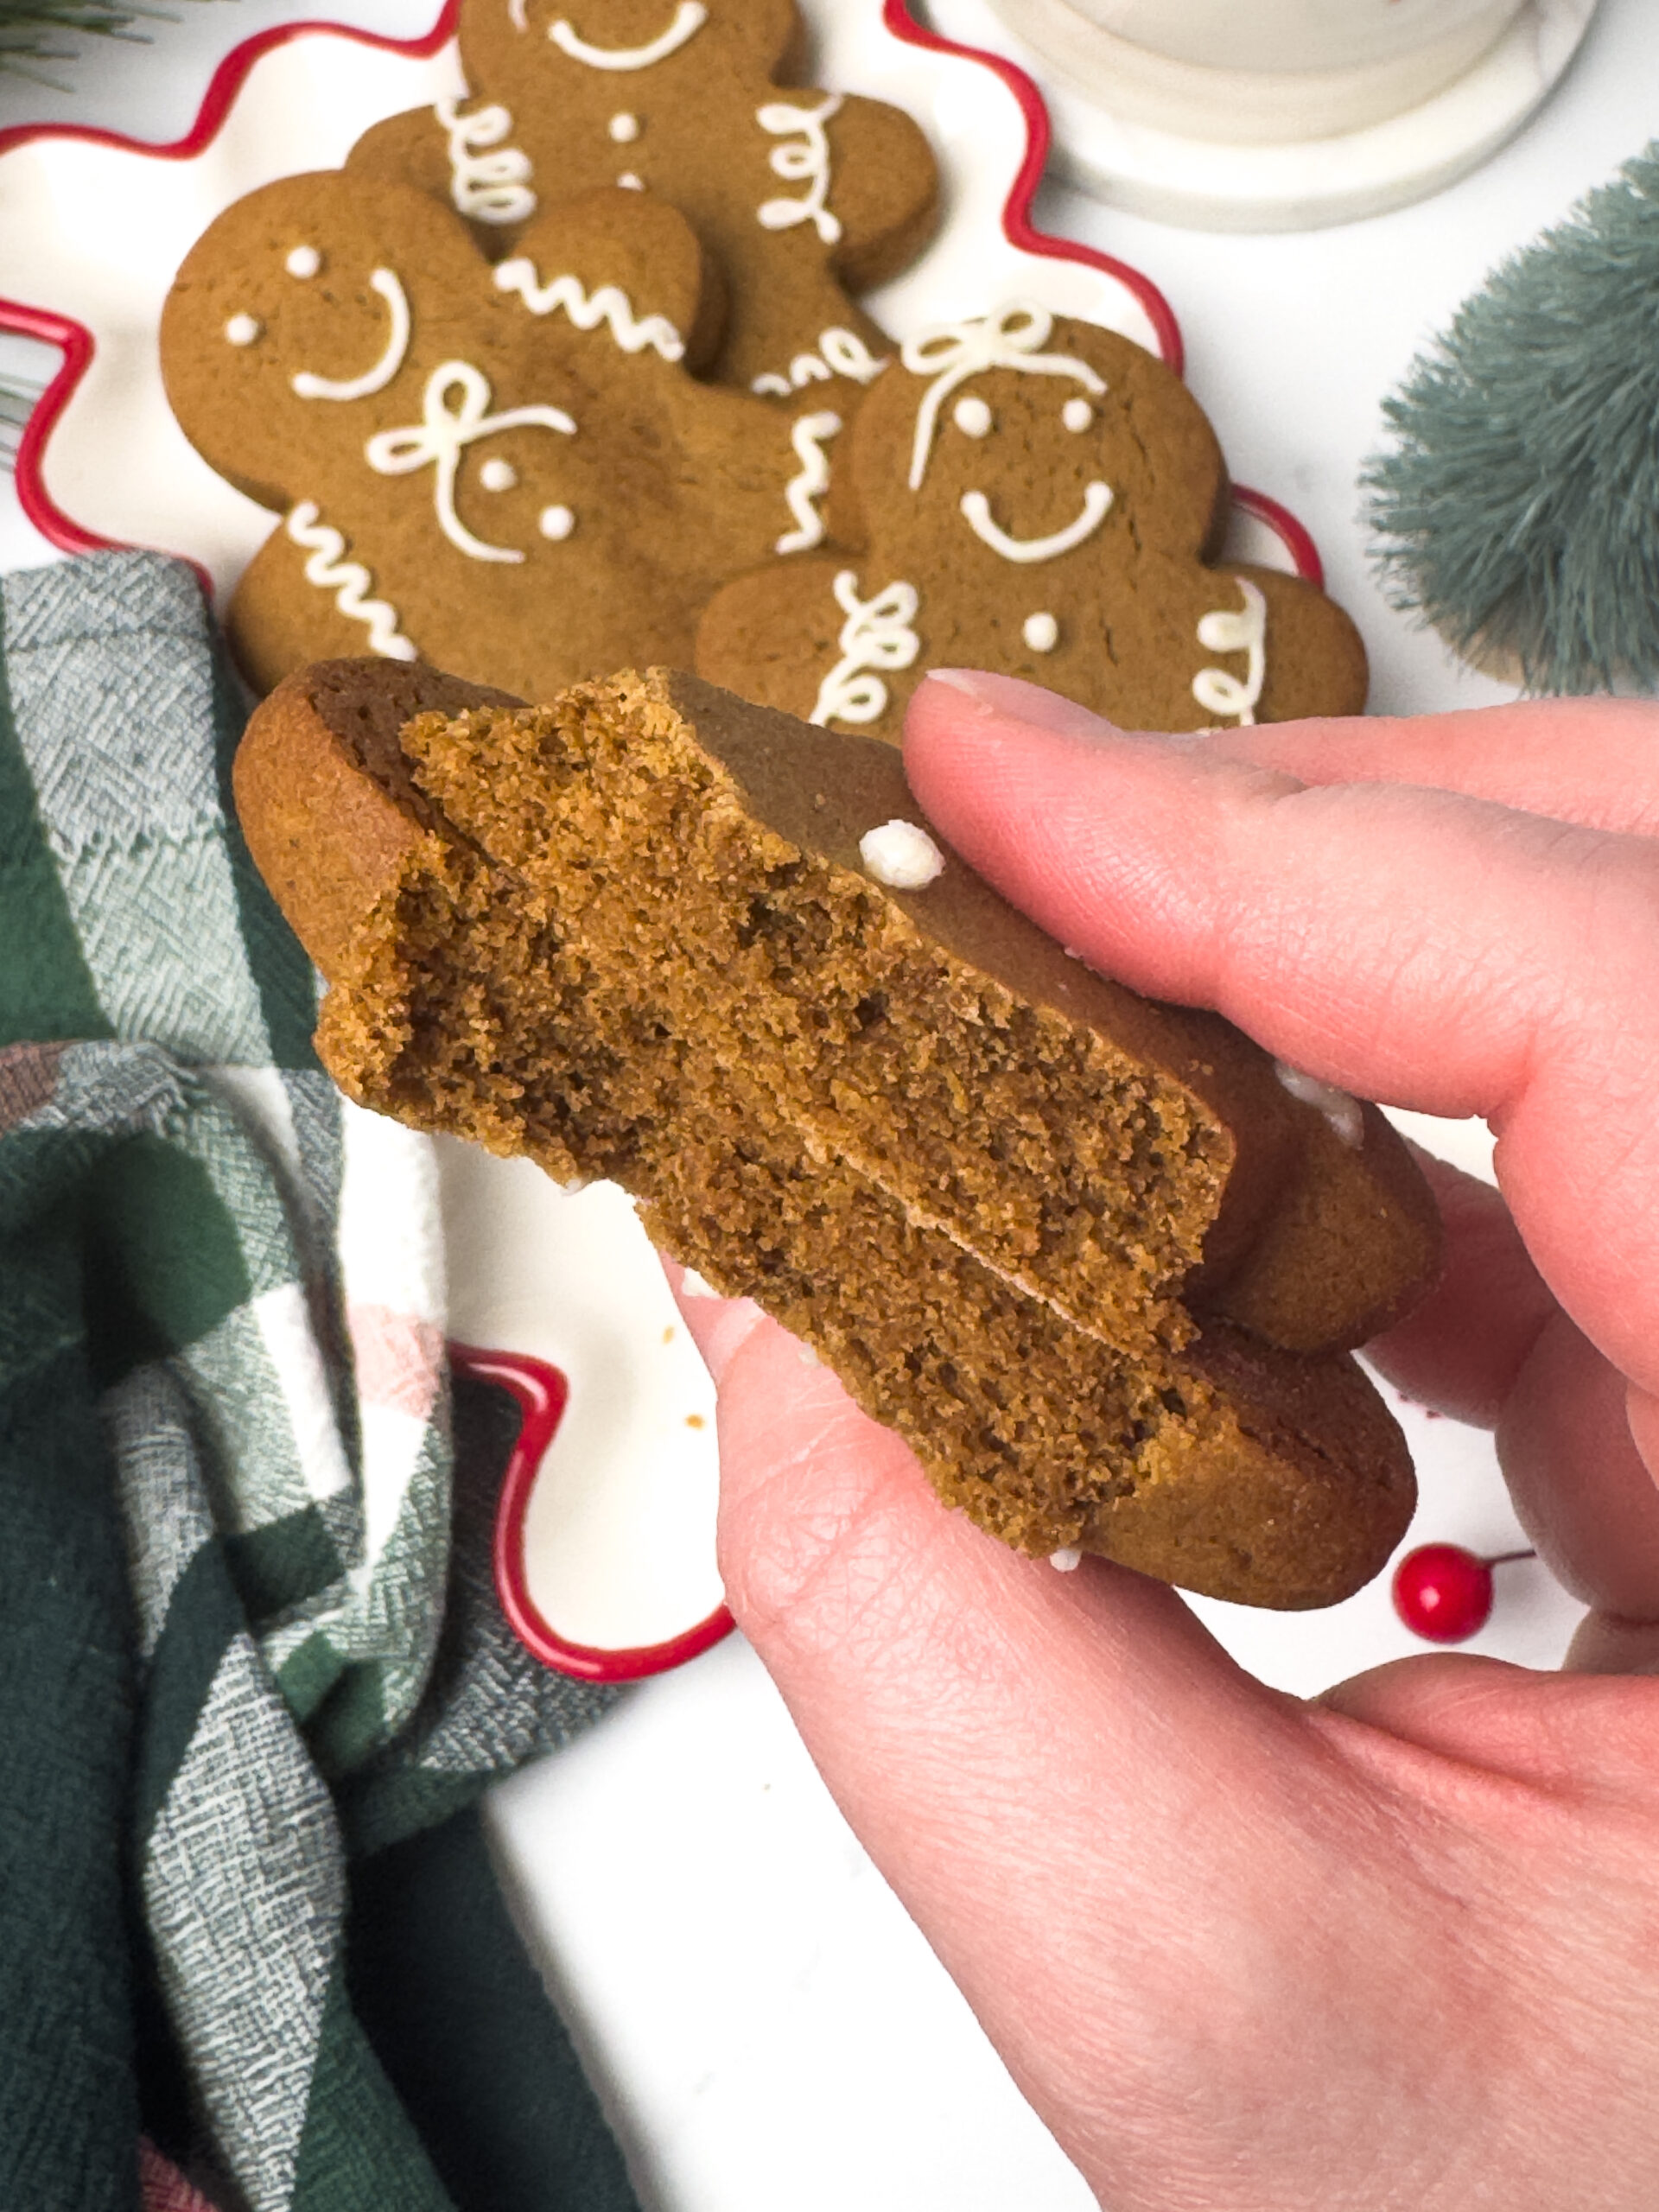
- Roll thick. I recommend rolling the dough to ⅜” thickness. You can roll the dough thinner, but I find that the thickness makes these tender, soft cookies.
- Allow cookies to cool. The cookies need to cool completely to room temperature before decorating, otherwise the frosting may start to melt. Allow the cookies to cool on the pan for about 10 minutes, then transfer them to a cooling rack to finish cooling to room temperature.
Gingerbread Cookie Recipe FAQs
What is the best way to store the cookies?
Store the finished cookies in an airtight container at room temperature for up to 3 days. The frosting will slightly crust, but it will take several hours. I recommend storing the cookies in single layers until you’re ready to serve or display the cookies so the frosting doesn’t get smashed.
Can the cookies be frozen?
Yes, the cookies, either plain or decorated, freeze great! For the naked cookies, simply store them in a zip-top bag or an airtight container in the freezer for up to 3 months. For decorated cookies, these can be stored in a single layer in an airtight container for up to a month. The cookies just need a few hours at room temperature to thaw.
How long can the dough be refrigerated?
The dough needs to chill in the fridge for at least 2 hours, but can be refrigerated for up to 24 hours. Just be sure to keep it tightly wrapped in plastic wrap so the dough doesn’t dry out.
How should I decorate the cookies?
Instead of traditional royal icing, I prefer to use buttercream for decorating these gingerbread men cookies. The icing forms a light crust like royal icing, so you can gently stack the cookies, and in my opinion, it’s better tasting too! I used a piping bag fitted with a #2 piping tip to pipe on all the details.
Baking Tip: Weigh Your Ingredients!
I highly recommend using a kitchen scale to weigh your ingredients rather than using measuring cups because it is the most accurate way to bake. Weighing your ingredients will give you more consistent results with your recipes and a better success rate, every time. Using a scale also saves you dishes which means easier cleanup! I provide gram measurements in all my recipes and this is the scale I love to use.
If you make this recipe and love it, be sure to leave a comment below. Happy baking!
Soft Gingerbread Cookies
Ingredients
For the Gingerbread Cookies
- ¾ cup (170g) unsalted butter, at room temperature
- ¾ cup 150g light or dark brown sugar
- ½ cup 6oz or 170mL molasses , (not blackstrap molasses)
- 1 large egg, at room temperature
- 1 teaspoon vanilla extract
- 3¼ cup (425g) all-purpose flour, plus more for rolling
- 2 teaspoons ground cinnamon
- 2 teaspoons ground ginger
- ¼ teaspoon ground cloves
- ½ teaspoon baking soda
- ½ teaspoon salt
For the Buttercream Icing
- ½ cup butter
- 1½ cups powdered sugar
- ½ teaspoon vanilla extract
- 1 pinch salt
- 2 Tablespoons (30mL) heavy cream, at room temperature
Instructions
- Gingerbread Cookies: In the bowl of a stand mixer fitted with a paddle attachment, cream the butter and brown sugar until combined and fluffy, about 2-3 minutes. Scrape the bowl well, then with the mixer on low speed, add the molasses, egg, and vanilla extract. Mix until well combined. The mixture will look curdled/separated at this point.
- In a separate bowl, whisk together the flour, spices, baking soda, and salt until combined.
- Scrape the sides of the mixing bowl again, then add the dry ingredient mixture. Mix just until the dough comes together, being careful not to overmix. Finish the dough by kneading it a few times with your hands to ensure it is fully combined.
- Press the dough into a disc and wrap it tightly in plastic wrap. Refrigerate for at least 2 hours.
- Once the dough is chilled, line 3 baking sheets with parchment paper.
- Place the disc of dough on a lightly floured surface. Sprinkle a little flour on top of the dough and roll it out to about ⅜” thickness. The dough can be any shape, as long as it is ⅜” thick. As you roll, rotate the dough to prevent it from sticking, sprinkling more flour underneath and on top as needed.
- Use a cookie cutter to cut out shapes from the dough, and place them on the prepared baking sheets, spacing them at least 2 inches apart. Chill the cookies in the fridge for 10-15 minutes before baking. Preheat oven to 350°F while they chill.
- Press the scraps of dough together, re-roll and cut out shapes 2 or 3 more times, until there is no dough left. Continue to chill each sheet of cookies for 10-15 minutes before baking, to prevent spreading.
- Once the cookies have chilled, bake for 8-10 minutes or until the cookies have puffed up and no longer appear wet on top.
- Allow the cookies to cool for at least 10 minutes on the baking sheet, then transfer to a wire rack to finish cooling completely before decorating.
- Buttercream Frosting: In the bowl of a stand mixer fitted with a paddle attachment, cream the butter on medium-low speed until smooth, creamy, and light in color, about 3-4 minutes. Scrape down the bowl with a rubber spatula.
- Add the powdered sugar, vanilla, salt, and heavy cream to the bowl. Mix on low speed until the ingredients are combined, so the powdered sugar doesn’t spill out. Scrape the bowl well with a rubber spatula.
- Once all the ingredients are combined, continue to mix the buttercream on low speed for an additional 5-10 minutes to make it smooth, creamy, and help remove any air bubbles.
- Decorating: Fill a piping bag fitted with a coupler and #2 piping tip, with the buttercream. Pipe the frosting onto the cookies as desired and enjoy!
Notes
- Storing: Store the finished cookies in an airtight container at room temperature for up to 3 days.
- Freezing: Stack the plain, undecorated cookies in an airtight container or zip-top bag and freeze for up to 3 months. Store decorated cookies in a single layer in an airtight container and freeze for up to 1 month. To thaw, allow the cookies to come to room temperature.