Vanilla Orange Brioche Rolls
Bright, citrusy orange and sweet vanilla flavors come together to create these Vanilla Orange Brioche Rolls. Fluffy, buttery brioche dough is layered with orange and vanilla bean infused filling, that’s finished with a luscious orange glaze.
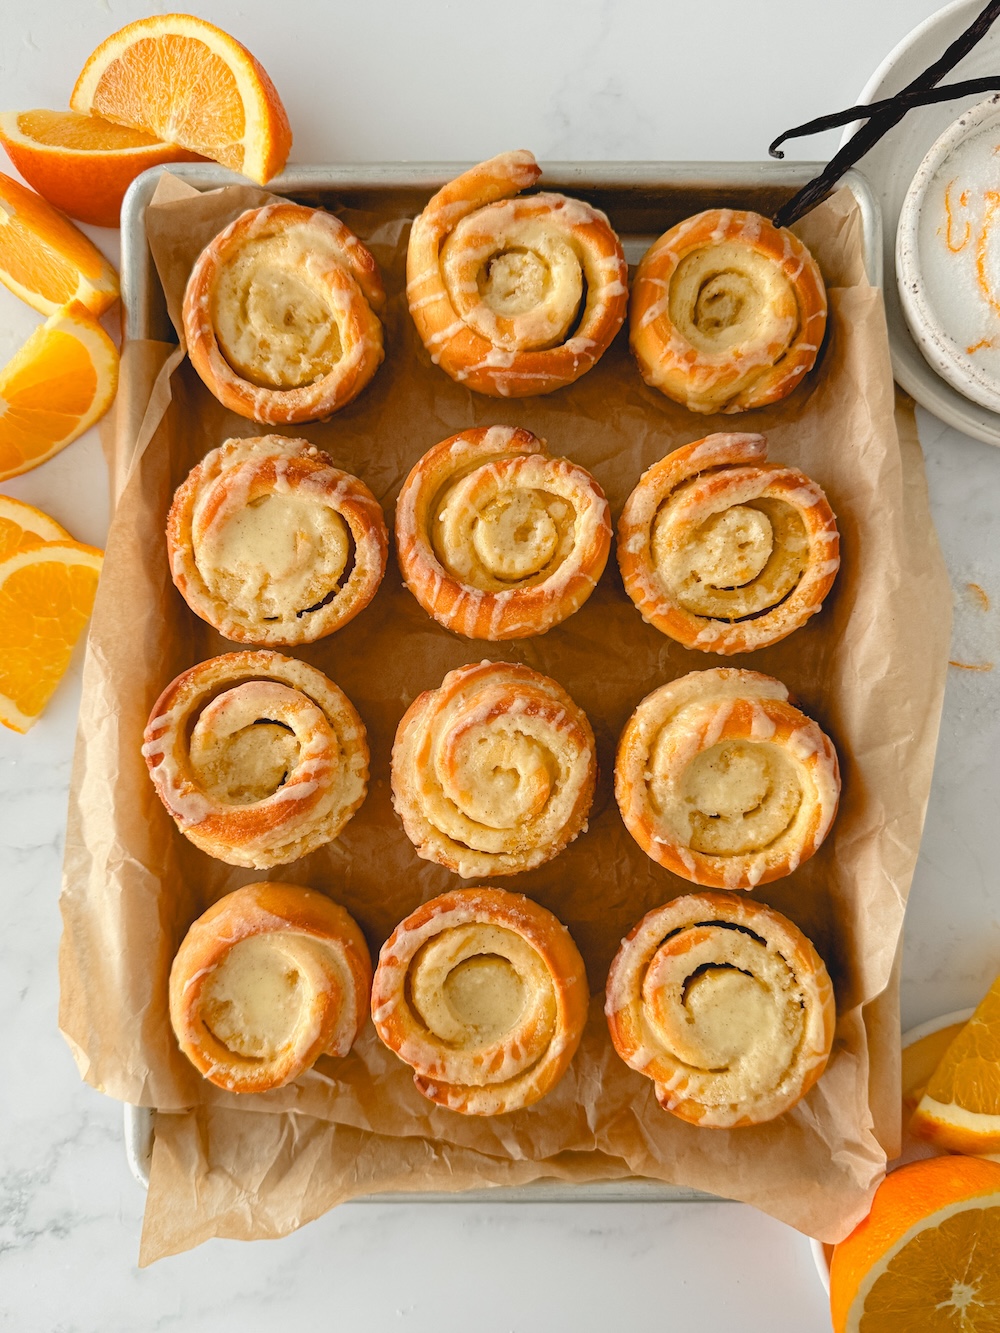
These Vanilla Orange Brioche Rolls combine the flavor of bright and citrusy oranges with the rich, floral notes of vanilla beans, creating a flavorful and fragrant pastry. Layers of soft, pillowy brioche dough are spiraled around a light and luscious filling made with fresh orange zest and vanilla bean paste, finished with a generous drizzle of orange glaze. These intricate layers promise a burst of citrus and vanilla in every bite. Best enjoyed fresh out of the oven, these orange vanilla bean rolls are perfect for breakfast, brunch, or a sweet indulgence any time of the day!

How to Make Orange Brioche Rolls
- Make the dough. First, milk and butter are heated and the mixture is added to the bowl of a stand mixer. Instant yeast is stirred in followed by flour, sugar, salt, and an egg. The dough gets mixed with the dough hook attachment for about 5-6 minutes. The dough will then rest in the fridge for at least 2 hours or up to overnight.
- Make the filling. For the orange vanilla bean filling, sugar and orange zest are combined – I like to rub this mixture between my fingers so the zest releases its oils for the most flavor. The orange sugar is combined with softened butter and vanilla bean paste. This mixture should be soft enough to spread over the dough but you can pop it in the microwave for 10 seconds if it’s too firm.
- Shape the rolls. The dough gets rolled out into a large rectangle and the filling is spread all over in an even layer. It gets rolled up into a log (like cinnamon rolls). The ends are trimmed off, then the log is cut into 12 equal pieces and each piece is placed into the cavity of a well-greased muffin pan. The shaped buns rest for about another 30 minutes, until slightly puffed.

- Bake the rolls. The buns bake at 350°F for 15-17 minutes and should be golden brown on top. Check that the internal temperature is 190°F if you aren’t sure if they are cooked through. Allow the orange rolls to cool in the pan for about 5 minutes. I like to flip the pan and leave it on top of the rolls for another few minutes so any extra filling can drip out onto the rolls while it’s still warm. Tap the pan firmly a few times to release the rolls.
- Finish with glaze. Make the glaze while the rolls are baking. Powdered sugar, orange juice, vanilla bean paste, and melted butter are whisked together – that’s it! Drizzle the glaze over the warm orange rolls and enjoy!

Orange Brioche Rolls FAQs
How should these be stored?
I highly recommend enjoying these orange rolls the same day they are baked. If you want to keep them an extra day, store them in an airtight container at room temperature. Warm the rolls up in the microwave for 10-20 seconds to bring them back to life the next day.
Can I freeze the orange rolls?
I recommend freezing the orange rolls once they are baked. Leave the glaze off and store them in a zip-top bag or airtight container in the freezer. When ready to serve, allow the rolls to thaw at room temperature overnight then refresh them in the oven and finish off with the glaze.
How long do the rolls need to cool before taking out of the pan?
The rolls should not cool for too long in the pan since the sugary filling tends to get pretty sticky as it cools, making it a lot more difficult to remove the rolls from the pan in one piece. Allow the rolls to cool for 5 minutes in the pan, then flip the pan and allow it to sit upside down for a few more minutes. Tap the pan on the counter a few times to release them.
Can I make these ahead of time?
Yes, you can make and shape the rolls on the first day and bake them off the next morning. Once the rolls are shaped and in the cupcake pan, cover with plastic wrap and place in the fridge overnight. Pull them out of the fridge the next morning and allow them to come to room temperature then bake as the recipe says.
Can I make the recipe start to finish in one day?
Yes, if you prefer to do the whole process in a day, just allow the dough to rise the first time in a warm spot, for about an hour instead of placing it in the fridge. Warm dough can be a little more difficult to work with than chilled dough so keep that in mind when rolling and shaping.


Baking Tip: Weigh Your Ingredients!
I highly recommend using a kitchen scale to weigh your ingredients rather than using measuring cups because it is the most accurate way to bake. Weighing your ingredients will give you more consistent results with your recipes and a better success rate, every time. Using a scale also saves you dishes which means easier cleanup! I provide gram measurements in all my recipes and this is the scale I love to use.
More Brioche Recipes You’ll Love
- Almond Cream Brioche Buns
- Nutella Brioche Buns
- Brown Butter Brioche Cinnamon Rolls
- Mini Brioche Slider Buns
- Chocolate Custard Brioche Donuts
If you make this recipe and love it, be sure to leave a comment below. Happy baking!
Vanilla Orange Brioche Rolls
Ingredients
For the Brioche Dough
- ½ cup (120g) whole milk
- 2 Tablespoons (28g) unsalted butter, cut into cubes
- 1 ½ teaspoons (6g) instant yeast
- 2 cups (260g) all-purpose flour
- 2 ½ Tablespoons (39g) granulated sugar
- ¼ teaspoon salt
- 1 large egg, at room temperature
For the Orange Vanilla Bean Filling
- ½ cup (100g) granulated sugar
- 1 teaspoon orange zest
- 4 Tablespoons (½ stick or 57g) butter, softened
- 1 teaspoon vanilla bean paste
For the Orange Glaze
- ¾ cup (90g) powdered sugar
- 2 Tablespoons orange juice
- 1 Tablespoon butter, melted
- ½ teaspoon vanilla bean paste
Instructions
- Brioche Dough: In a small saucepan, add the milk and butter and heat on low until the mixture reaches at least 90°F but no warmer than 110°F. Add the milk and butter to the bowl of a stand mixer fitted with a dough hook attachment. Stir in the yeast.
- Add the flour, sugar, salt, then egg to the bowl. Mix on low speed until the dough comes together then scrape down the sides of the bowl. Continue mixing for about 5 minutes, until the dough has pulled away from the sides of the bowl. Scrape the bottom of the bowl then mix for another 30 seconds to a minute until the dough is smooth, and only slightly sticky.
- Form the dough into a ball and place it in a large bowl greased with cooking spray or oil. Cover with plastic wrap and allow it to rise in the fridge for at least 2 hours or up to overnight.
- Orange Vanilla Bean Filling: Combine the granulated sugar and orange zest, rubbing it between your fingers to release the oils from the zest. Add the softened butter and vanilla bean paste and mix until well combined. Set aside.
- Assembly & Shaping: Spray a 12-count muffin pan well with nonstick cooking spray. Once the dough is ready, remove from the fridge and press out any excess air then place it onto a lightly floured surface.
- Using a rolling pin, roll out the dough into a rectangle measuring approximately 12” x 16”. Spread the orange vanilla bean filling evenly across the dough, leaving about a ½-inch border on each side. Starting with one of the long sides, roll up the dough tightly into a log. Place the seam side down and use a sharp knife to trim off the ends. Slice the log into 12 equal pieces, each measuring about 1¼” wide. Place the pieces cut-side up into the cavities of the prepared muffin pan.
- Loosely cover the rolls with plastic wrap and allow them to rise in a warm spot until slightly puffed, about 30 minutes. Preheat oven to 350°F.
- Once the rolls are puffed, bake for 15-17 minutes or until golden brown. The internal temperature should be 190°F. While the rolls are baking, make the glaze.
- Orange Glaze: In a small bowl, whisk together all of the glaze ingredients until well combined. Set aside.
- Allow the rolls to cool in the pan for about 5 minutes then flip the pan onto a piece of parchment paper. Leave the pan upside down on top of the rolls for a few minutes, to allow all the warm filling to drip out of the pan. Tap the muffin pan on the counter to help release the rolls from the pan.
- Flip the rolls over so the flat side is on the bottom, allow to cool, drizzle with glaze, and enjoy!



It was amazing…
I’m so glad to hear you enjoyed these! Thanks for trying the recipe 😊